Extracting audio from a CD
You can extract tracks from a CD and add them to the Project Media window as .wav files.
Important:
Vegas Movie Studio HD Platinum software is not intended for, and should not be used for, illegal or infringing
purposes, such as the illegal copying or sharing of copyrighted materials. Using Vegas Movie Studio HD Platinum software for such
purposes is, among other things, against United States and international copyright laws and contrary to the terms and conditions of
the End User License Agreement. Such activity may be punishable by law and may also subject you to the breach remedies set forth in
the End User License Agreement.
1.
Insert the audio CD into your CD/DVD drive.
2.
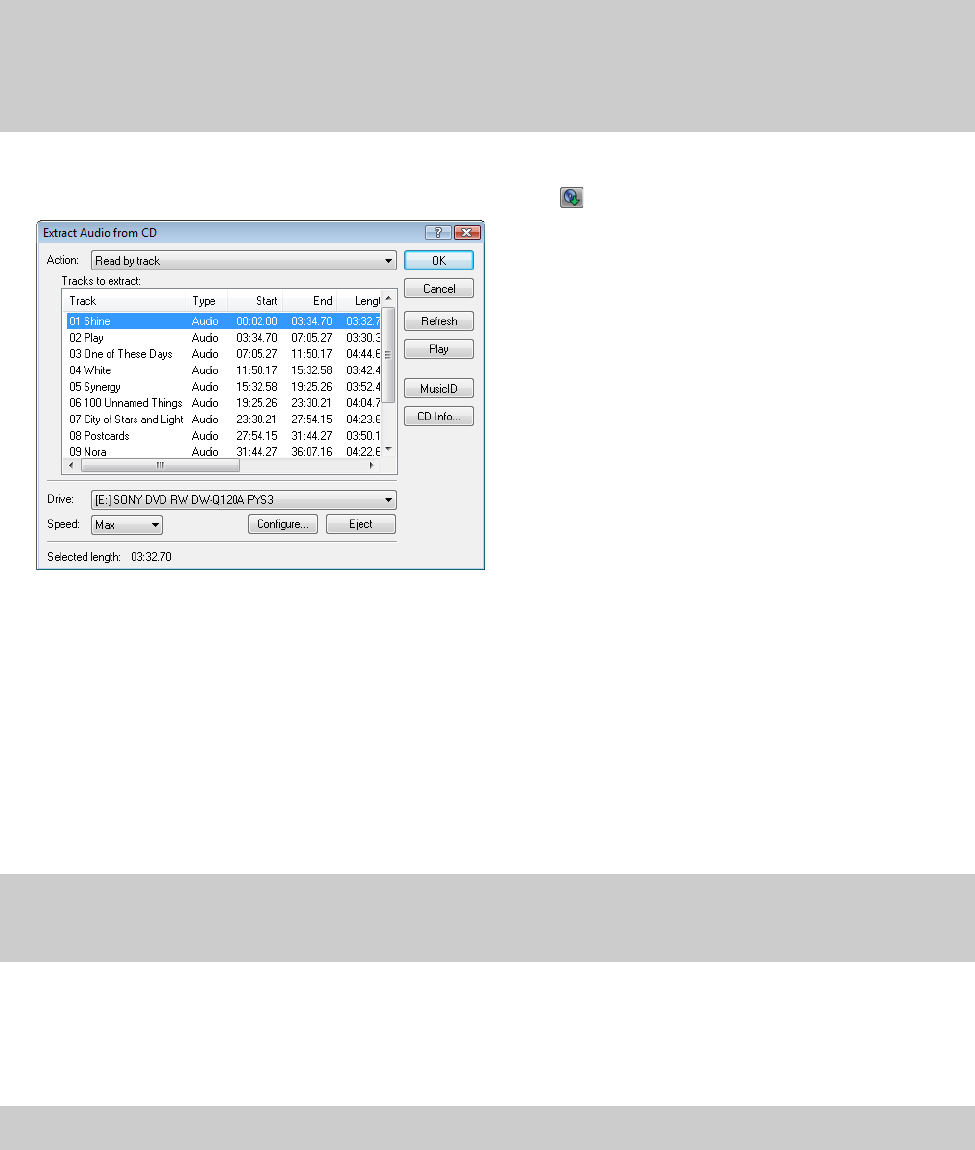
In the Project Media window, click the Extract Audio from CD button ( ). The Extract Audio from CD dialog appears.
3.
From the Action drop-down list, choose the method you want to use for extracting the CD audio:
• Read by track - Use this option to choose the tracks you want to extract from the CD.
• Read entire disc - Use this option to automatically extract all tracks on the disc. The entire CD is extracted into one new
file in the Project Media list.
• Read by range - Use this option to extract audio from a specified range of time.
4.
If you chose either the Read by track or Read by range option, specify the track(s) or range to extract:
• For Read by track, select the tracks you want to extract in the Tracks to read list. Use the Ctrl or Shift keys to select more
than one track. Each track is extracted into a separate file in the Project Media list.
• For Read by range, type a time in the Range start field and either the Range end or Range length fields. The range of
audio is extracted into one new file in the Project Media list.
Note:
If you want to extract multiple tracks to a single file, choose Read by track from the Action drop-down list to select your
tracks, and then choose Read by range from the Action drop-down list. The appropriate time range for the tracks you selected
will automatically be inserted and the time range will be extracted to a single file.
5.
From the Drive drop-down list, choose the drive containing the audio CD from which you want to extract.
6.
From the Speed drop-down list, choose the speed at which you want to extract the audio. If you experience any problems
extracting audio, you can try decreasing the selected speed, or you can click Configure to adjust the Audio extract
optimization setting.
Note:
To eject the CD at any time prior to beginning the extraction process, click the Eject button.
7.
Click OK. The Save As dialog appears.
8.
Select a name and location for the new .wav file.
9.
Click Save to begin extracting the audio.
The track is extracted and a progress meter is displayed to indicate the percent complete. When extraction is complete, the
new .wav file appears in the Project Media window.
20
| CHAPTER 2
