Sony Notebook User Guide
Connecting peripheral devices
63
nN
Connecting a printer
You can connect a Windows-compatible printer to your computer to print documents.
Connecting a printer using the USB connector
To connect a printer using the USB connector, proceed as follows
1 Plug an optional USB printer cable into one of the USB connectors on your computer or your docking
station. A USB connector is identified by the symbol.
2 Plug the printer power cord into an AC outlet.
Before using the printer, you may need to change the Printer settings in the Sony Notebook Setup software.
Turn off your computer and the printer, unplug the AC adapter and the power cord before connecting the printer.
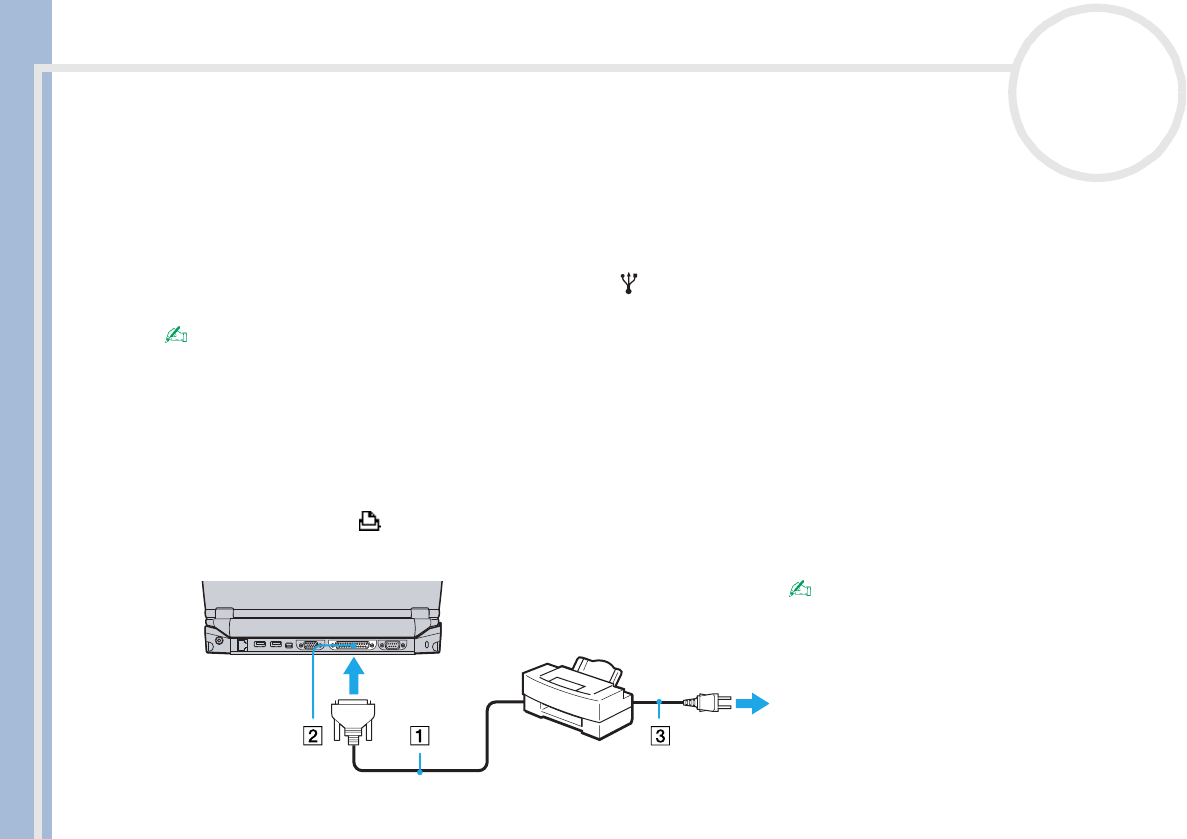
Connecting a printer using the printer connector
The docking station (optional) is equipped with a printer connector.
To connect a printer using the printer connector, proceed as follows:
1 Plug the printer cable (1) supplied with the printer into the docking station printer connector (2)
identified by the symbol.
2 Plug the printer power cord (3) into an AC outlet.
Before using the printer, you may need to change the
Printer settings in the Sony Notebook Setup software.


