


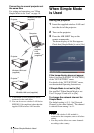

11When Simple Mode is not Used
IP Address: select the IP address setting
from among 0 to 255.
Subnet Mask: select the subnet mask
setting from among 0 to 255.
Default Gateway: select the default
gateway setting from among 0 to 255.
MAC Address: the MAC address of the
attached wireless module is displayed.
You can set the projector by using the
browser. See “Projector setting” on page
14 (“Setting/Operating the Projector from
the Computer (via Web)”).
To save the setting
Select the [OK] button and press the ENTER
key. The settings are saved and the home
display appears.
To clear the setting menu without
saving the setting
Select the [Cancel] button and press the
ENTER key.
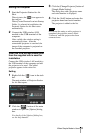
Setting the computer
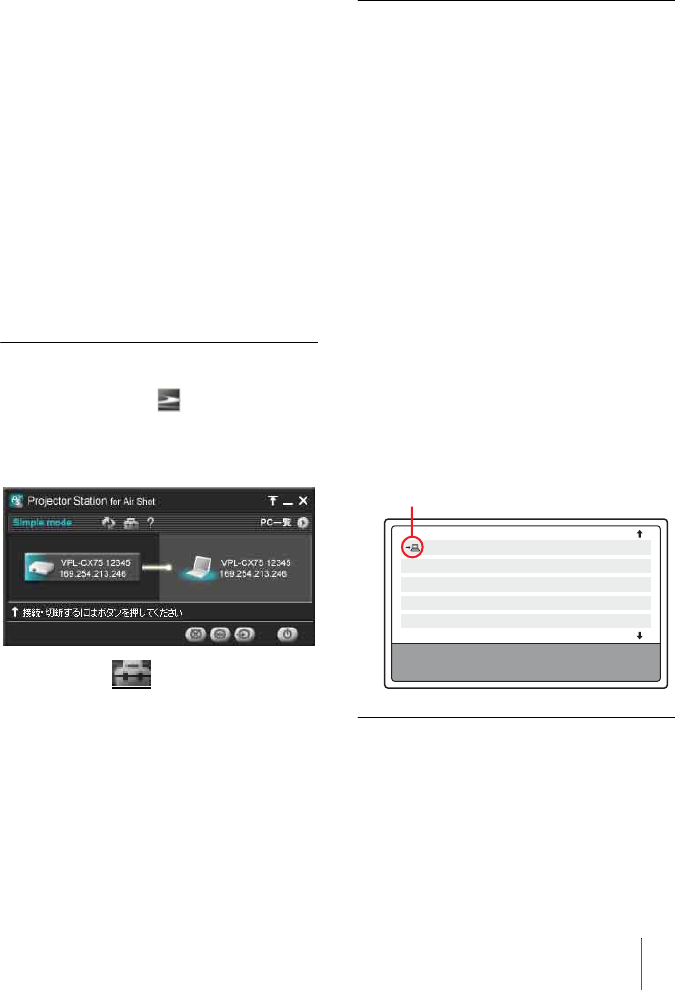
1 Right-click the [ ] icon in the task
bar.
The main window of Projector Station
for Air Shot opens.
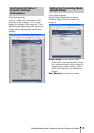
2 Click the [ ] button of the main
window to open the [Option] dialog
box.
For details of the [Option] dialog box,
see the help manual.
3 Select [Off[ in [Simple Mode].
4 When the supplied USB wireless LAN
module is used, set the wireless LAN
referring to the User’s Guide of the
wireless LAN module.
When a device other than the supplied
wireless LAN module is used, set the
wireless setting of the computer so
that the projector and computer can be
connected.
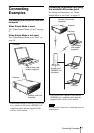
Connecting the projector and
computer
You can project an image of the computer on
the projector after the connection operation.
For details of the operation, see the help
manual.
When accessing from the computer
Open the main window of Projector Station
for Air Shot and connect the computer and
the projector referring to the help manual.
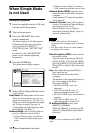
When accessing from the projector
1 Press the AIR SHOT key on the
remote commander.
The connectable computer list appears.
2 Press M or m key on the remote
commander to select the computer to
be connected, and then press the
ENTER key.
For disconnecting
Press M or m key to select the computer to be
disconnected, and then press the ENTER
key.
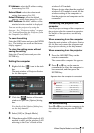
Yamada PC
Connect PC?
Connecting PC: Yamada PC
(xxx. xxx. xx. x)
Tanaka PC ( xx. x. xx. xx )
Suzuki PC (xxx. xxx. xx. x)
Saito PC ( xx. x. xx. xx )
Sakuma PC (xxx. xxx. xx. x)
Appears when the computer is connected.