


TUP900 Paper Feed Sensor Adjustment – See photos below
This is a multi-step process:
1. Ensure that the paper is loaded on the spindle and that the two black plastic
sleeves are positioned on either side of the paper roll in order to keep the roll
centered on the spindle and from sliding left or right.
2. Power on the printer. If the paper does not automatically feed through the
presenter on power up then you will see a solid red light on LED 2 that will start
flashing after a second or two following power up. At this point the paper width
sensor needs an adjustment.
3. Power off the printer.
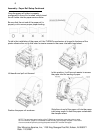
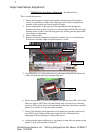
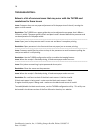
4. Remove the printer from the kiosk and turn it upside down to locate the Paper
Feed Sensor assembly. Make sure the Presenter is closed.
Cogged Wheel
Black Raised Positioner
Paper Feed Senso
r
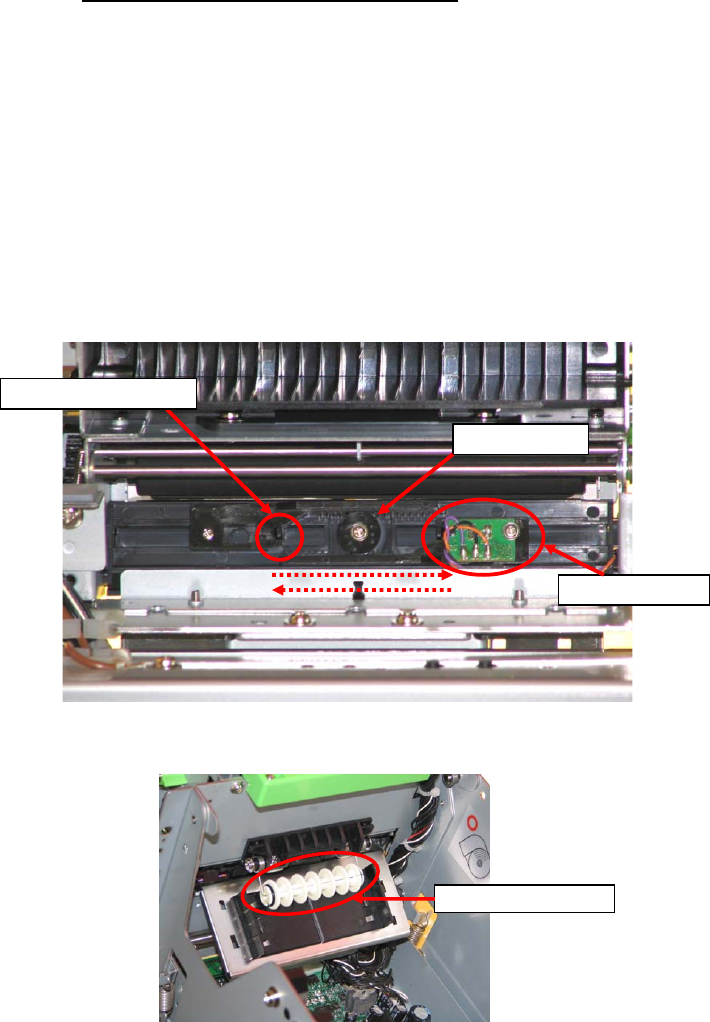
5. Turn the printer over and position the end of the paper under the rear white feed
rollers and slide the paper into the paper feed area.
White Feed
Rollers
Paper Feed Sensor Adjustment:
6. Power on the printer. You will see 2 lights, a solid green power LED 1 and a solid
Red error light on LED 2 that will start flashing after a second or two following
power up. If the printer needs a fine adjustment of the Paper Feed Sensor, turn the
printer over in order to access the sensor assembly.
7. Slowly slide the black raised positioner on the paper feed assembly until the red
error LED2 stops flashing and the paper begins to feeds *Warning: Over
adjustment will cause the paper to snag on the sensor.
8. At that point the paper width sensor is set properly to detect the new paper and the
printer is ready to be installed in the kiosk.
7
Star Micronics America, Inc., 1150 King Georges Post Rd, Edison, NJ 088371
Date: 12/3/2007