


10 Printer Setup
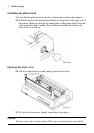
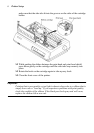
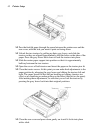
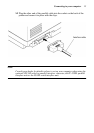
❏ Pass the fanfold paper through the space between the printer case and the
rear cover, with the side you want to print on facing down.
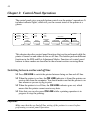
❏ Unlock the two tractors by pulling up their gray levers, and slide the
tractors so they are aligned approximately with the holes on the sides of the
paper. Press the gray levers back down to lock the tractors into place.
❏ Slide the center paper support into position so that it is approximately
halfway between the two tractors.
❏ Open the covers of both tractors and insert the paper so the tractor pins fit.
❏ Close the tractor covers. At this point you can make final adjustments to the
paper position by releasing the gray levers and sliding the tractors left and
right. The paper should lie flat with no buckling or bulging (tractors too
close) or no stretching or undue pulling on the holes (tractors too far apart).
After making these adjustments, be sure that you re-lock the tractors by
pressing the gray levers back into their original positions.
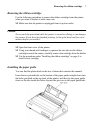
❏ Close the rear cover and press down gently on it until it locks into place
with a click.