QUICK SETUP
If you feel very comfortable with the installation of personal computer
hardware, you may want to use this section to help you quickly set up
your P170/P170v.
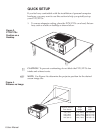
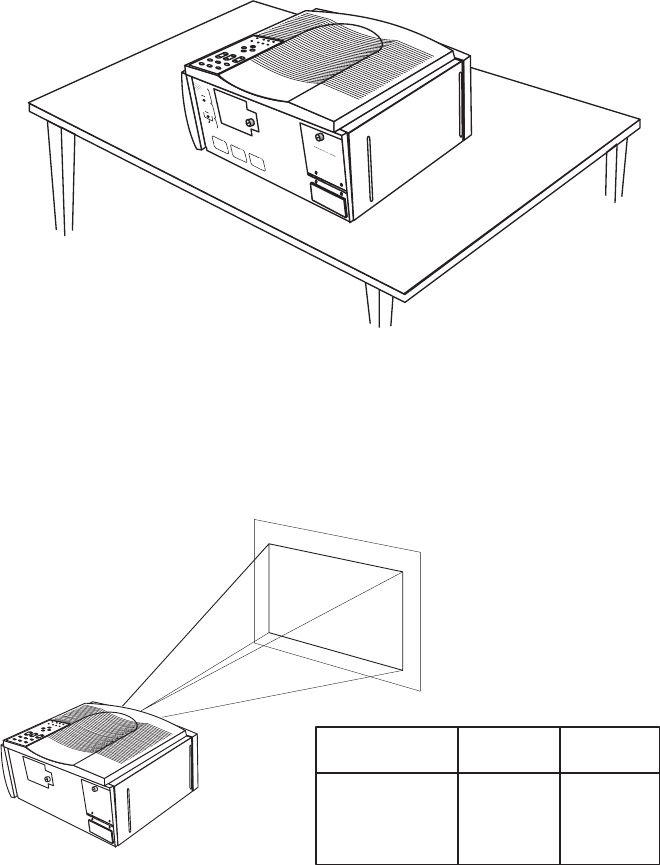
1. To ensure adequate cooling, place the P170/P170v on a hard, flat sur-
face, such as a table or desktop as shown below.
CAUTION! To prevent overheating, do not block the P170/P170v fan
intake and exhaust vents.
NOTE: Use Figure 4 to determine the projector position for the desired
screen image size.
AUDIO
AUDIO
AUDIO
VIDEO
VIDEO
MONITOR
COMPUTER1
COMPUTER2
OUTPUT
SPARELAMP
ACVoltage:115V,60 Hz
230V,50 Hz
SEE BOTTOM
FORFUSE
REPLACEMENTAND
VOLTAGESWIT CH
VIDEO
VIDEO
LR
LR
S-VHS
TV2
TV1
WARNING:HOT
Allow unit to cool before
replacing lamp. Avoid touching
bulb or inside of reflector.
Replace with FXL Lamp.
!!
Figure 3.
P170/P170v
Position on a
Desktop
Figure 4.
Distance vs Image
☞
Projector Distance
From Screen
4 ft (1.2 m)
6 ft (1.8 m)
8 ft (2.4 m)
10 ft (3.0 m)
Image
Height
2.1 ft (0.6 m)
3.2 ft (1.0 m)
4.25 ft (1.3 m)
5.3 ft (1.6 m)
Image
Width
2.8 ft (0.9 m)
4.2 ft (1.3 m)
5.6 ft (1.7 m)
7.0 ft (2.1 m)
6 User Manual


