


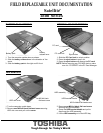
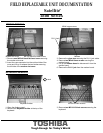
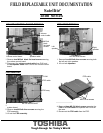
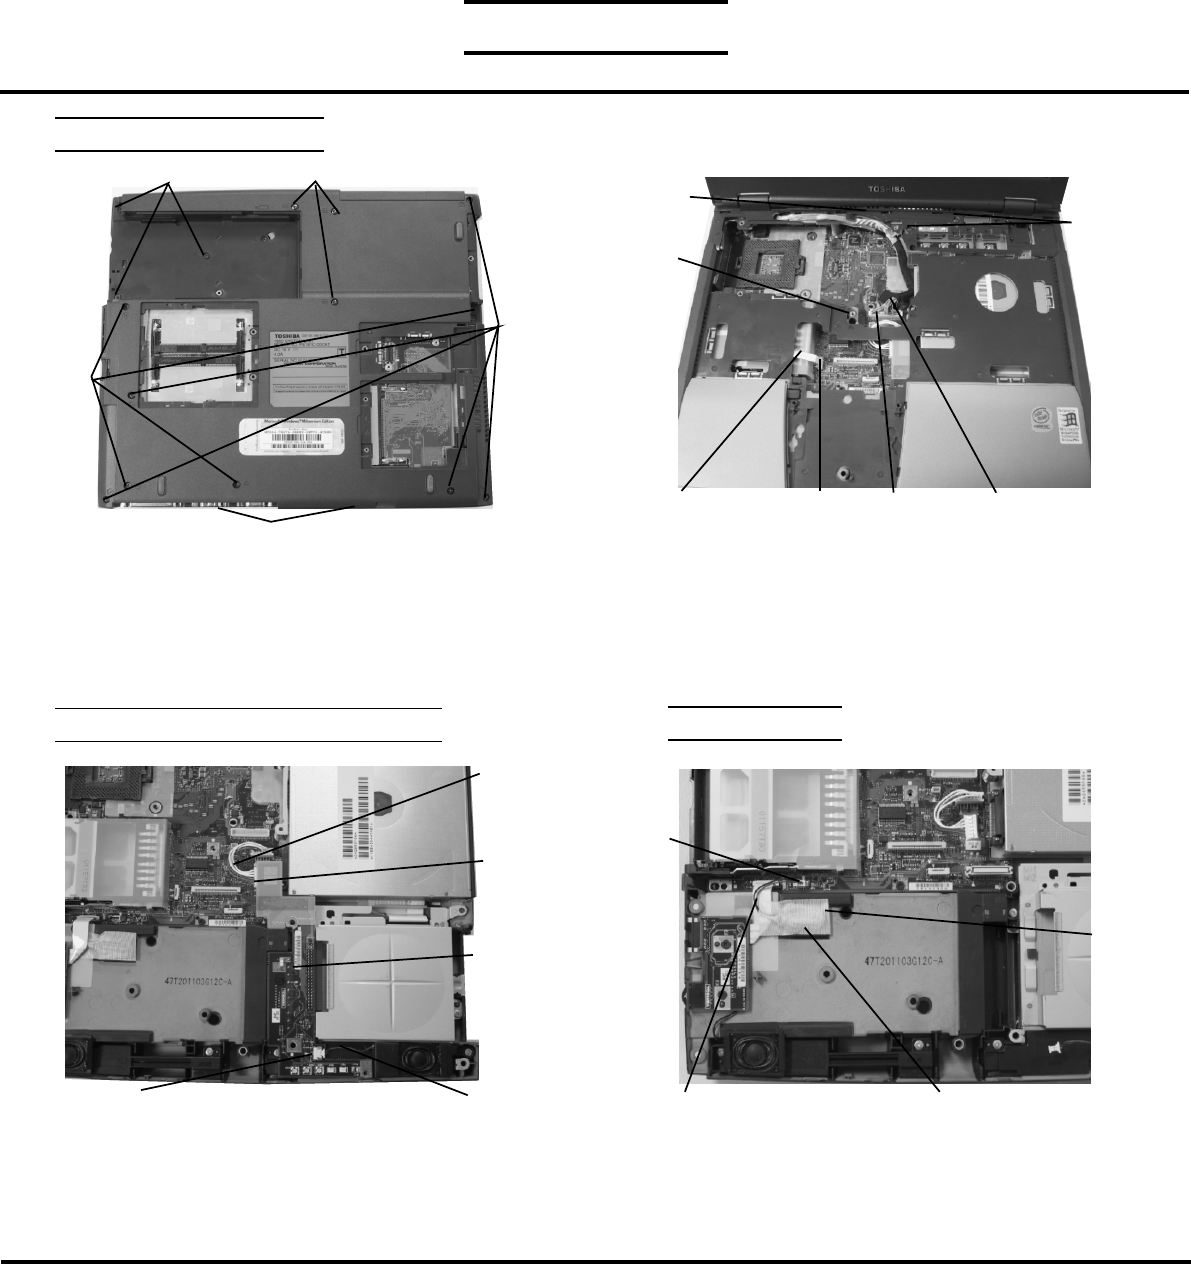
HDD/BATTERY BOARD REMOVAL
1. Disconnect the HDD/Battery board cable from PJ4
on the HDD/Battery board.
2. Disconnect the right speaker cable from PJ2 on the
HDD/Battery board.
3. Disconnect the HDD/Battery board from PJ320 on
the system board.
HDD/Battery
board cable
HDD/Battery
board
Right speaker cable
PJ2
PJ4
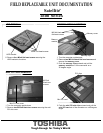
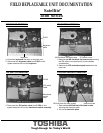
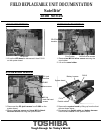
RTC REMOVAL
1. Remove the glass tape securing the RTC battery.
2. Disconnect the RTC battery cable from PJ752 on
the system board.
3. Lift out the RTC battery.
FIELD REPLACEABLE UNIT DOCUMENTATION
1800 Series
TOSHIBA
Tough Enough for Today’s World
PJ752
RTC battery cable
RTC battery
Glass
tape
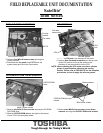
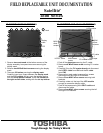
TOP COVER REMOVAL
1. Turn the computer upside down and remove the
following seventeen screws:
- 5 M2.5x4 black flat head screws
- 4 M2.5x6 black flat head screws
- 5 M2.5x20 black screws
- 3 M2.5x25 black screws
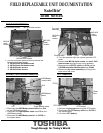
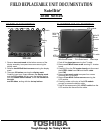
2. Turn the computer right side up and open the LCD
panel.
3. Remove one M2.5x6 black screws and two 2.5x25
black screws securing the top cover assembly.
4. Disconnect the LCD/FL cable from PJ34 and the
CD-ROM controller flexible cable from PJ426.
5. Remove the top cover assembly by lifting up the
back side of the cover.
M2.5x6
black
screws
M2.5x4 black screws
M2.5x25 black screws
M2.5x6
black
screws
M2.5x4 black screws
M2.5x20
black
screws
LCD/FL cable
PJ34
Flexible cable
PJ426
M2.5x25
black
screws
Top cover
assembly
Satellite
TM