Printing Guide — Monitoring Print Jobs with TopAccessDocMon 329
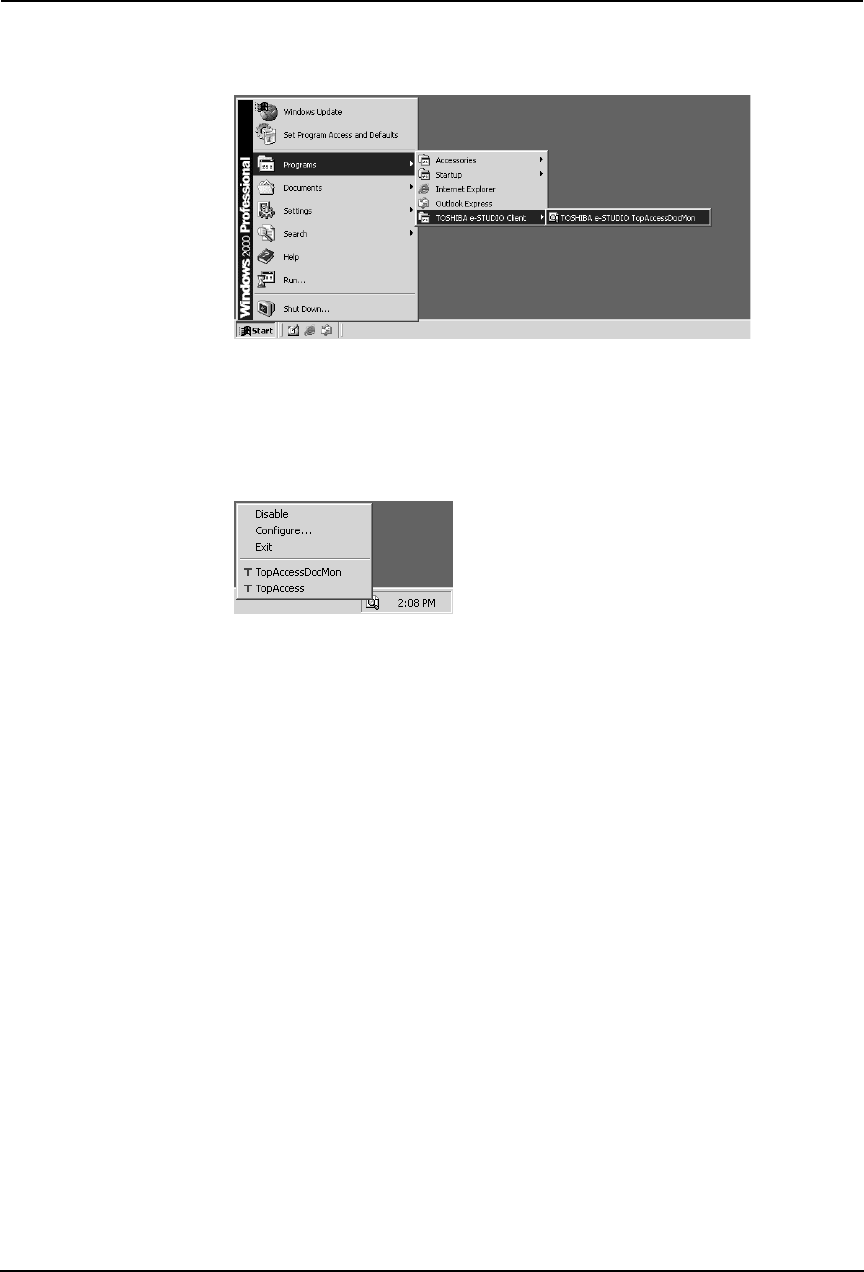
2. Select [TOSHIBA e-STUDIO Client] in the [Programs] menu,
and click [TOSHIBA e-STUDIO TopAccessDocMon].
• The TopAccessDocMon icon appears in the taskbar.
— Document Monitor Taskbar Menu
After TopAccessDocMon is activated, you can access its functions from the Document Monitor
menu (display from the TopAccessDocMon icon in the taskbar).
The following menus appears in the Document Monitor taskbar menu:
• Disable/Enable — This allows you to enable or disable document monitoring.
To turn on document monitoring, click [Enable] from the Document Monitor menu. The
option changes to Disable and displays the TopAccessDocMon icon on the taskbar. Click
[Disable] to terminate document monitoring.
• Configure — This allows you to configure how TopAccessDocMon monitors the devices.
When this is selected, the configuration dialog box appears.
P.329 "Configuring TopAccessDocMon"
• Exit — This allows you to exit TopAccessDocMon.
• TopAccessDocMon — This allows you to display the TopAccessDocMon window for the
default printer.
P.339 "TopAccessDocMon Window"
• TopAccess — This allows you to access TopAccess on the default printer. This is available
only when the default printer is set to either the e-STUDIO4511 Series, e-STUDIO450
Series, e-STUDIO280 Series, GL-1020, or GL-1010.
Configuring TopAccessDocMon
The configuration dialog box allows you to set startup options, select notification events and
methods, display or modify refresh rates, and manually update device discovery settings.
In the configuration dialog box, the following tabs are displayed:
• Startup — This controls whether TopAccessDocMon is launched when starting Windows.
P.330 "Configuring the Start Up Options"
• Notification — This controls which printing events cause a popup message or beep alert.


