


2.BASIC OPERATION
Scan to File 21
2 BASIC OPERATION
7
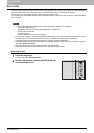
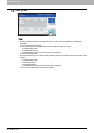
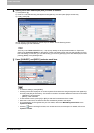
If SMB is selected for the file destination, select the folder to be stored.
1) Select the folder to be stored.
2) Press [OK].
Proceed to Step 9.
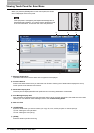
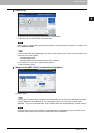
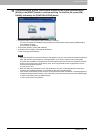
8
Select a folder for the remote destination.
1) Select FTP, SMB, NetWare IPX, NetWare IP, or FTPS as a protocol to transfer the file.
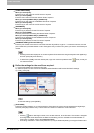
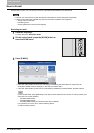
2) Press [SERVER NAME], [NETWORK PATH], [LOGIN USER NAME], [PASSWORD] and/or [COMMAND
PORT] and specify the file destination.
3) Finally, press [OK].
y [SERVER NAME] (FTP, NetWare IPX, NetWare IP, and FTPS only)
When you select [FTP]:
Enter the IP address of the FTP server. For example, to transfer the scanned data to “ftp://10.10.70.101/user01/
scan/,” enter “10.10.70.101” in this box.
When you select [NetWare IPX]:
Enter the name of the NetWare file server or the Tree/Context (when NDS is available).
When you select [NetWare IP]:
Enter the IP address of the NetWare file server.
When you select [FTPS]:
Enter the IP address of the FTP server. For example, to transfer the scanned data to “ftps://10.10.70.101/user01/
scan/,” enter “10.10.70.101” in this box.
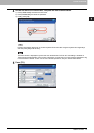
y [NETWORK PATH]
When you select [FTP]:
Enter the path to a folder in the FTP server where you want to store the scanned data. For example, to transfer the
scanned data to “ftp://10.10.70.101/user01/scan/,” enter “user01\scan” in this box.
When you select [SMB]:
Enter the network path to the folder where you want to store the scanned data.
When you select [NetWare IPX] or [NetWare IP]:
Enter the path to a folder in the NetWare file server where you want to store the scanned data. For example, to
transfer the scanned data to the “sys\scan” folder in the NetWare file server, enter “\sys\scan” in this box.
When you select [FTPS]:
Enter the path to a folder in the FTP server where you want to store the scanned data. For example, to transfer the
scanned data to “ftps://10.10.70.101/user01/scan/,” enter “user01\scan” in this box.