20
appear.
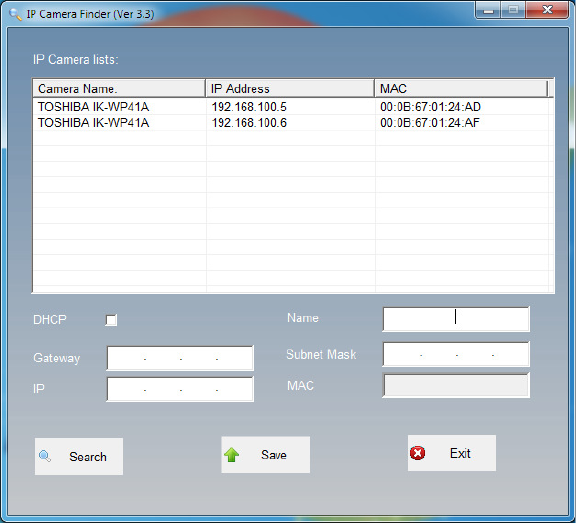
Click the camera you want to configure the network settings. If you have multiple
cameras connected to your local network, the MAC address on the camera to
distinguish the target camera from others.
Configure the following settings as needed.
Name: Enter a descriptive name for the camera.
Network Setting: If you have a DHCP server on your network to assign IP
addresses to network devices, enable the DHCP option. Otherwise, manually
enter the IP, Subnet Mask and Gateway settings.
Click Save to enable the settings and click Exit to exit the utility.
Double-Click the listed camera to login.
NOTE
If IP Camera Finder does not find the camera during the search, try turning off the
wireless LAN of a PC.
DHCP server needs to be doing normal performance, before turning on a camera.
IP Camera Finder can search the location of the Network Camera even though DHCP
is not used on the network. In this scenario, assign the camera a static IP address
because the IP address of the Network Camera has been assigned 169.254.*.* by
default.
Immediately after turning on a power of camera, even if IP camera finder displays an IP
address, it may sometimes be connectable.
In this case, please wait for 30 seconds and double-click.
IP Camera Finder is compatible only with Windows® XP, Windows Vista®, and
Windows® 7.
