


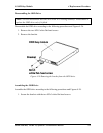


4.11 System Board, Speaker and MIC, AC-IN, 4 Replacement Procedures
RJ11/45, MDC cable
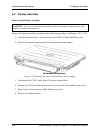
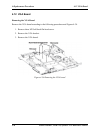
Installing the System Board, Speaker and MIC, AC-IN, RJ11/45, MDC cable
Install the System Board, Speaker and MIC, AC-IN, RJ11/45, MDC cable according to the
following procedures and figure 4-31, 4-32 and 4-33.
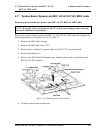
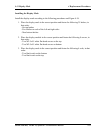
1. Place the L and R speaker box on the bottom cover.
CAUTION: Use care to avoid that the RJ11/45, AC-IN and MDC cable is caught
between the main board and base body.
NOTE: Be careful of the eject button for the PC card. It can be damage when removing
the board. Make sure it is pushed in.
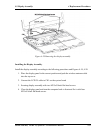
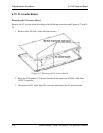
2. Connect the RJ11/45, AC-IN and MDC cable to CN505, CN3009, CN501 and CN502
on the system board.
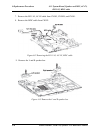
3. Turn the system board upside down and place the system board and RJ11/45 and AC-
IN connector on correct position.
4. Seat the cable cover.
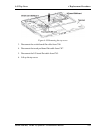
5. Connect the L and R speakers connector to CN2, CN4 on the system board.
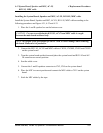
6. Place the MIC in correct position and connect the MIC cable to CN11 on the system
board.
7. Stick the MIC cables by the tape.
Satellite M40/M45, TECRA A4, dynabook Vx/4 Maintenance Manual 4-47