


19
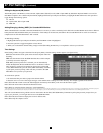
24. Toolbar (Continued)
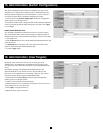
Disconnecting the Remote Session
To disconnect the session, on the Toolbar, click the
button. The Login page appears, allowing you to re-login or close the browser window.
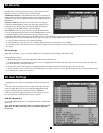
Tripp Lite Icon Menu Features
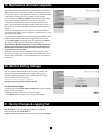
Right-clicking the Tripp Lite Icon
will pull up a menu. From this menu you can access the connected devices using the following features.
Disconnect: Disconnect the remote session by clicking Disconnect. You can also Disconnect by using the Disconnect button on the Toolbar.
About: This veries the Client, Firmware, Keyboard/Mouse Emulation (KME) Firmware and Switch File Versions installed on your Netcommander IP.
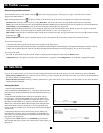
Local Settings: Click Local Settings to pull up the Client Conguration Dialog Box. See gure below.
Pointer type: From the Drop-down menu you can change the appearance of the Client Computer Mouse Pointer. It can be set to appear as the Client
Mouse Pointer directly on top of the Target Server Mouse Pointer (Default), as a dot or to not appear at all.
Hide Toolbar: Check this option to hide the Toolbar from the next reconnection onwards. To toggle the Toolbar on and off, press F9 or double-click the
System tray icon
.
Full Screen Mode: Check this option to make the remote session screen appear in full screen mode from the next reconnection onwards.
To work in full screen mode:
1. Ensure that the Client computer has the same screen resolution as the Target Server.
2. Select the Full Screen option from the Icon Menu or press F11. The Internet Explorer window disappears, leaving the Internet Explorer menu bar at the top.
3. Right click the Internet Explorer menu bar and check Auto-Hide. The Internet Explorer menu bar disappears. You are in full screen mode.
To exit full screen mode:
Press F11. Or place the mouse at the top of the window to display the Internet Explorer toolbar and click Restore button.
Configuration: This only appears in the menu when an Administrator is logged in. Click Configuration to access the Web conguration interface.
25. Safe Mode
If you are in a situation where you can’t access the Web Conguration Interface using the usual method, you can do the following while in Safe Mode:
Restore Factory Defaults: When you cannot access the system (e.g. you have forgotten the Username or Password) you can restore the NetCommander
IP’s factory defaults from the Safe Mode.
Restore the Device Firmware: If during a rmware update there is a power failure and you can no longer access the system, you can restore the device
rmware from the Safe Mode.
Entering Safe Mode
1. Turn the NetCommander IP KVM Switch Off .
2. Press and hold down the Local button for 3-4 seconds, while at the same
time powering up the Netcommander IP. The NetCommander IP boots up in
Safe Mode.
3. When the NetCommander IP has booted up in Safe Mode, and you
are connected to a network with a DHCP server, a new IP Address will
be pulled. Have your Network Administrator identify the newly assigned
IP Address from the DHCP server. To help locate the IP Address in the
DHCP server, reference the MAC Address located on the underside of the
NetCommander IP. The device number (D.N.) can be found in the same
location. If there is no DHCP server, the unit boots with the static IP address
192.168.2.155.
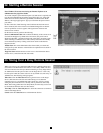
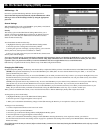
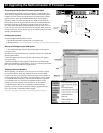
4. Open Internet Explorer and type the following into the Address box:
http://192.168.x.xxx/cong. (Do not start the address with HTTPS) Vista
users need to log onto Internet Explorer in administrator mode. The Login
Page appears. See gure below.
5. Type Username: admin and Password: SAFEmode. (Case sensitive).
This username and password works only in Safe mode. A menu appears, see
gure below.