Installation
Vidikron Vision Model 15 Installation/Operation Manual 33
3.11
Installing and Adjusting
the CineWide Anamorphic
Lens
If you are installing a Vision 15ET/CineWide, proceed as follows to install and adjust the
anamorphic lens.
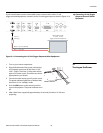
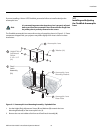
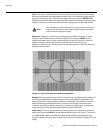
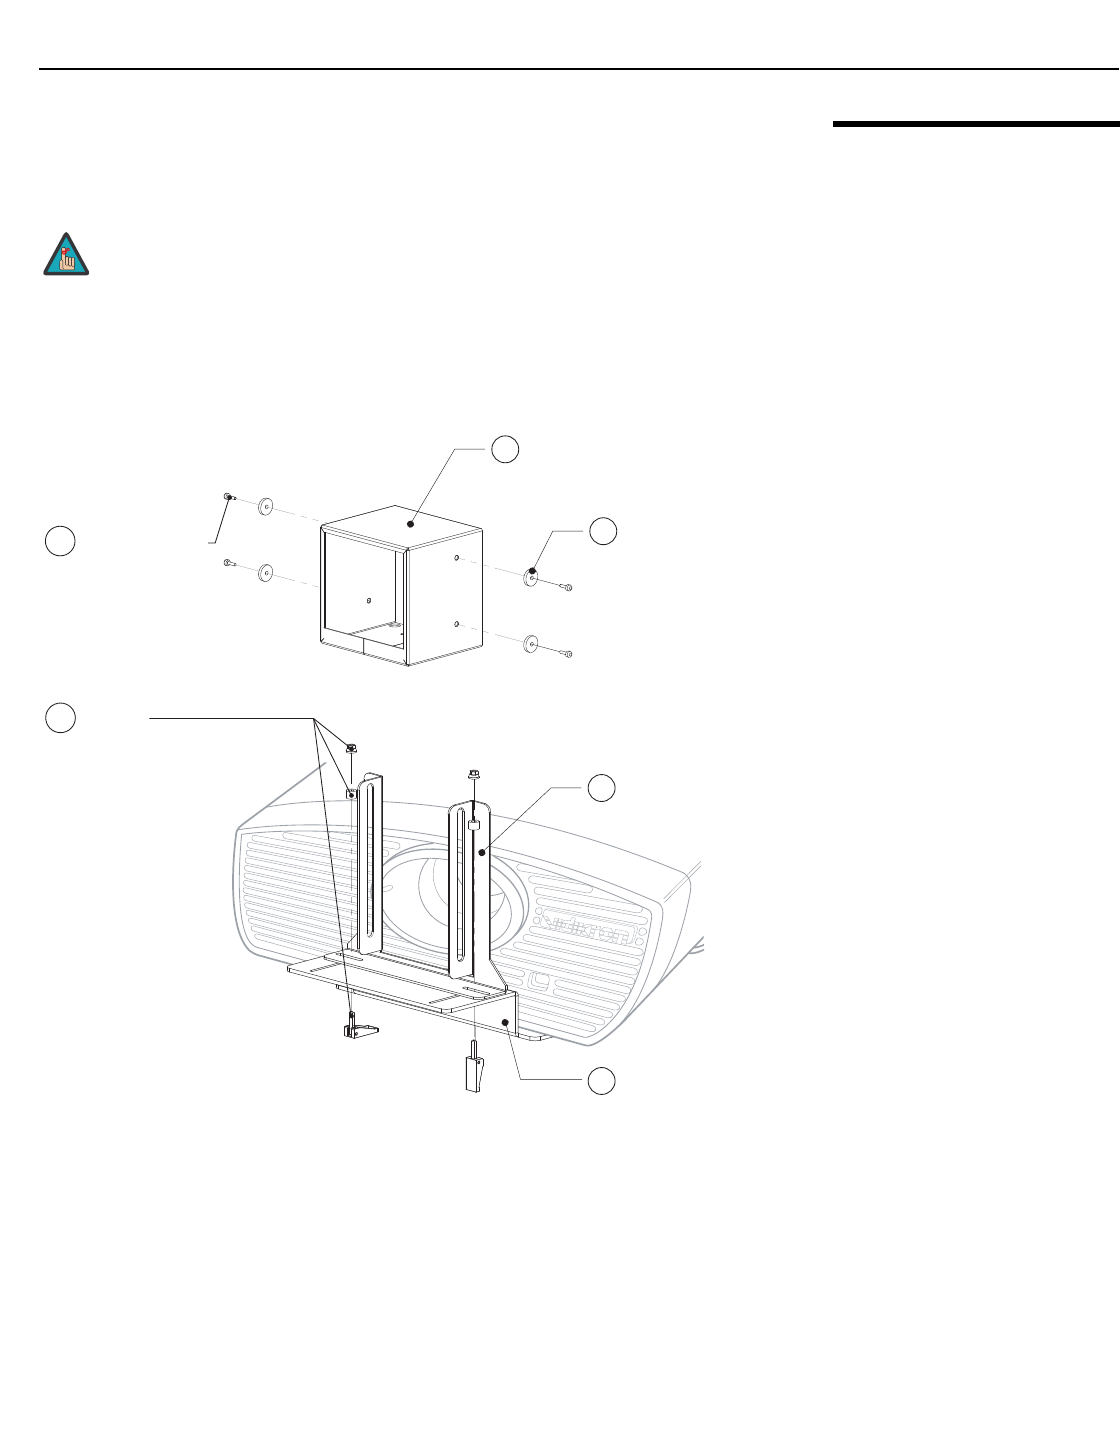
The CineWide anamorphic lens mount kit consists of everything shown in Figure 3-17. Some
components shipped with your projector may differ slightly from what is shown in these
instructions.
Figure 3-17. Anamorphic Lens Mounting Assembly - Exploded View
1. Use the Height/Pitch Adjustment Screws (2) and Washers (3) to attach the Lens
Mounting Bracket (5) to the Anamorphic Lens (1).
2. Remove the nut and rubber collar from each Swell Latch Assembly (4).
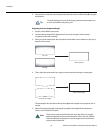
It is extremely important that the primary lens is properly adjusted
before you install the anamorphic lens. Ensure that the image from
the primary lens is perfectly centered on the screen.
Note
3 Height/Pitch
Adjustment
Screw,
4-40 x 1/4"
(4x)
4 Swell
Latch
Assembly
(2x)
1 Anamorphic Lens
2 Washer (4x)
6 Anamorphic Lens
Base Plate
5 Anamorphic Lens
Mounting Bracket


