Osprey 240e/450e User Guide
ViewCast 7
Setting Driver Properties
After installing the Osprey card and AVStream driver, you need to access the card’s settings and possibly
modify them to fit your needs. This manual takes you step-by-step visually through the card settings.
Start by opening the Osprey Config utility. Afterwards, we can explore the driver.
You need to use a DirectShow application such as Microsoft Windows Media® Encoder or
RealProducer®. We also access card property pages through Osprey Config, the utility bundled with our
4.5 driver suite. Once installed you can see the card’s default settings and change them as needed.
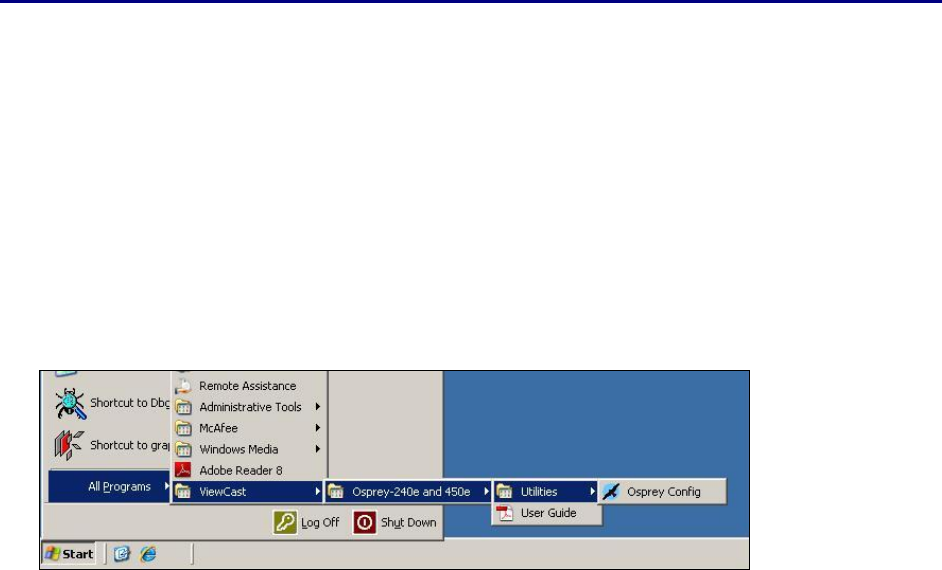
To open Osprey Config click All Programs in the Start menu of your Windows computer, then click the
ViewCast folder icon. Click Osprey 240e and 450e, then Utilities and the Osprey Config icon becomes
visible (Figure 4).
Figure 4. Accessing the OspreyConfig Utility
Note: Other DirectShow applications can find the property page too. If you use a third-party
application, you will find how to access the card’s settings in the third-party application’s
documentation.


