CONNECTING THE SERVER AND GETTING STARTED
16
WD SENTINEL RX4100
ADMINISTRATOR AND MAINTENANCE GUIDE
Connecting the WD Sentinel RX4100 Server from a Client
Computer (Optional Method)
As an alternative, you can set up your WD Sentinel RX4100 using a client computer without
connecting a monitor, keyboard, and mouse to your server. Use the following steps to
connect your WD Sentinel RX4100 to your network from a client computer.
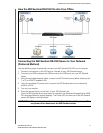
1. Using the provided ethernet cable, connect the WD Sentinel server (either ether net port
1 or 2) to a DHCP-enabled LAN.
2. Using the provided AC power cord, connect the WD Sentinel server to an electrical
outlet or a UPS.
3. Press the power button on the front of your WD Sentinel unit.
Once the WD Sentinel boot up process is complete, the LED on the front of the
WD Sentinel server will display a solid blue light.
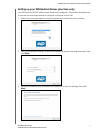
4. In the address field of an open browser window, type http://WDSENTINEL/Setup.
Note: The default server name (i.e., WDSENTINEL) is used to access the WD Sentinel
setup screen in your browser. If other devices using the same name are located on
your network, you will first have to either disconnect the device before setting up
your new WD Sentinel server, or obtain the IP address of your new WD Server. Once
the IP address is obtained, type http://<IP address>/setup in your browser window.
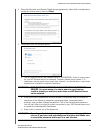
5. Select Download and run the setup wizard button.
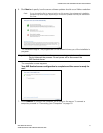
6. At the warning prompts, click Run and Yes as appropriate.
WARNING! This process takes a few minutes. Do not interrupt the process. Do
not power off or disconnect the WD Sentinel server.


