4.3. Initialize Unit to Default Settings
If SetUp Switch settings are changed, new parameters will not take effect until the APS is
initialized.
CAUTION: After initialization, the APS will revert to the parameters specified
by the SetUp Switches. Any command-selected parameters will be lost.
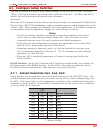
1. Simultaneously press the SET and CLEAR buttons, located on the face of the APS.
2. Release the CLEAR button, wait for the Port LEDs to flash, and then release the SET
button.
4.4. Connecting Devices to the APS
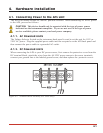
The APS RS232 Ports are standard DB9 connectors, configured as DTE Ports, and are similar
to a standard serial port on a PC.
1. Access the APS Command Mode.
2. Determine which APS port will be used for connection to the new device (e.g. Port 3).
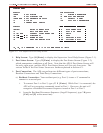
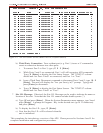
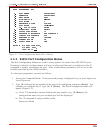
3. Check Buffer: Type /S [Enter] to display the Port Status Screen. Check the "Buffer
Count" column, which lists the amount of data stored in the buffer for each port.
a) If the Port Status Screen shows data stored in the buffer for the desired port, type /E
xx [Enter] to clear the buffer (where xx is the desired port number).
b) Note that cleared data cannot be recovered.
4. Use an appropriate DB9 cable to connect the RS232 serial port on the device to the
selected DB9 port on the APS.
a) External Modems and other DCE Devices: Use a standard serial modem cable.
b) PCs and other DTE Devices: Use a standard null modem cable.
5. Select communication parameters for the port as described in Section 5.
4-4


