Page 1 of 1
The Calibrate Margins Menu allows you to adjust the printer's imaging area relative to the edges of the paper. The
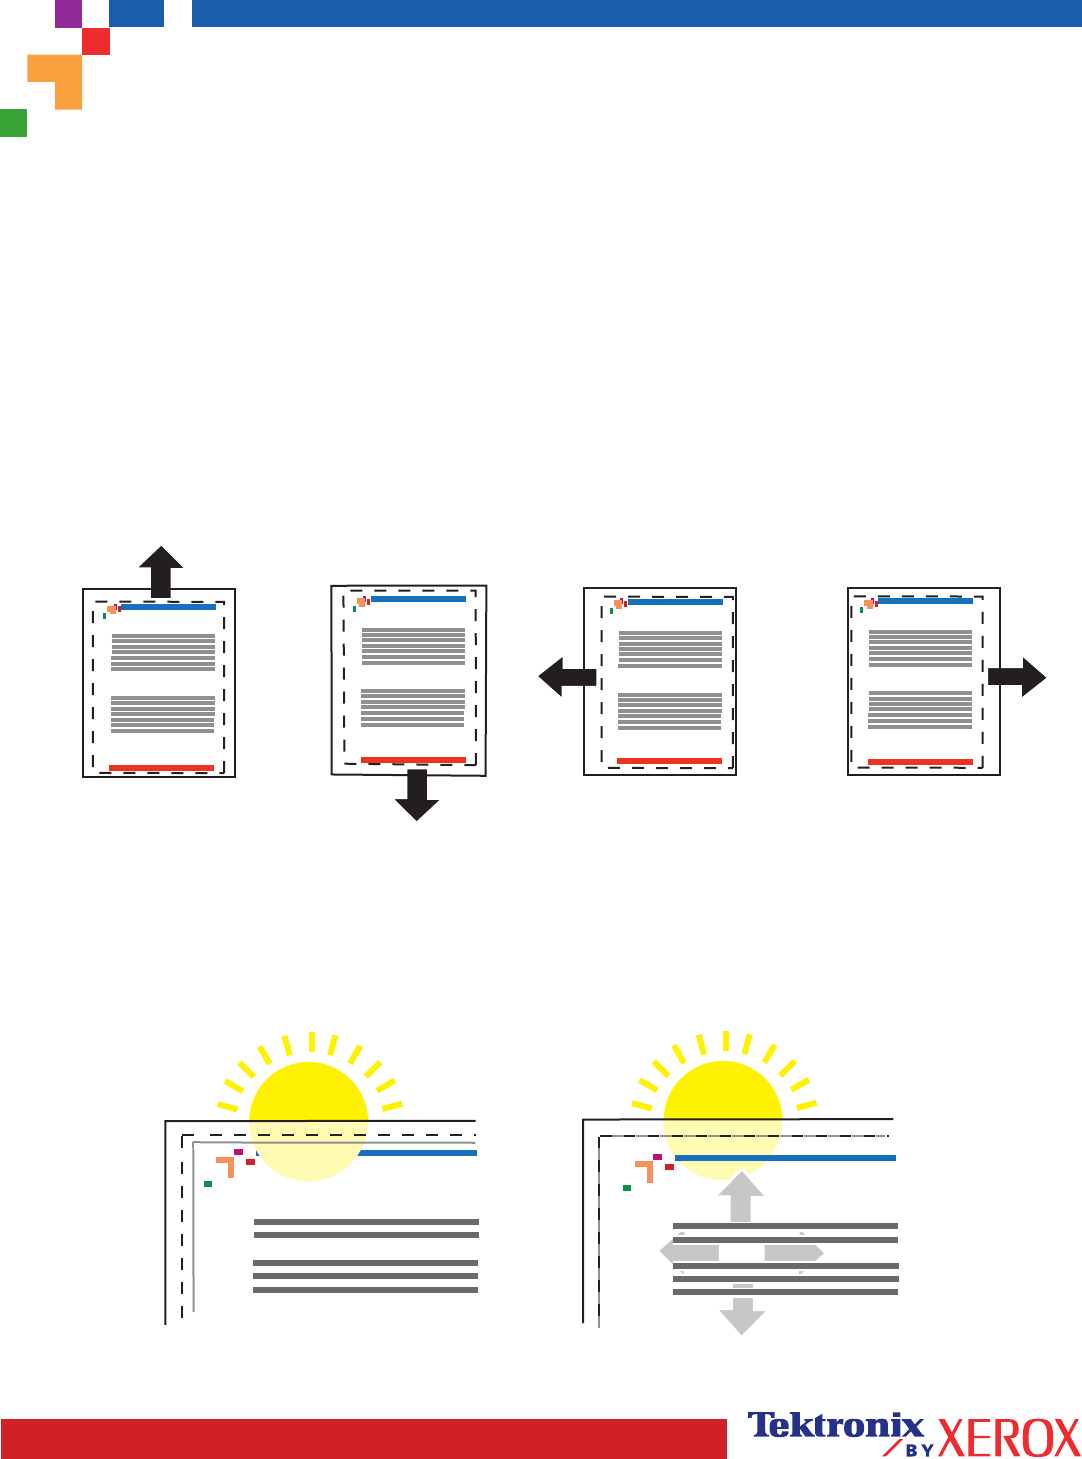
imaging area is shown as a dashed rectangle; the printer will not print outside this rectangle.
Step 1. Adjust Side 1 Margins. To move the dashed rectangle to the postion you want it on the page:
1. From the printer's front panel Support Menu, scroll to Improve Print Quality? and press OK.
2. Scroll to the Calibrate Margins Menu and press OK. Select Print Calibrate Margins Page and press OK to print this
page.
3. To move the dashed rectangle you see on the page printed to the position you want, use the front panel menu
items Adjust Side 1 "A" Margin and Adjust Side 1 "B" Margin as illustrated below.
4. Reprint this page to verify the adjustment.
You can adjust the settings from -40 to +40 units. The thickness of the rectangle's dashed lines is 1 unit. 12 units move
the rectangle 1 mm. The maximum distance the rectangle can be moved (-40 to +40) is 6.7 mm.
Decrease Adjust Side 1 "B"
Margin setting to move left.
Increase Adjust Side 1 "A"
Margin setting to move up.
Increase Adjust Side 1 "B"
Margin setting to move right.
Decrease Adjust Side 1 "A"
Margin setting to move down.
Step 2. If the printer has the duplex option, adjust Side 2 Margins.
1. With Side 1 facing you, hold the print up to a strong light. Note the shadow of the solid lines printed on Side 2.
2. Use the front panel menu items Adjust Side 2 "A" Margin and Adjust Side 2 "B" Margin to move the Side 2 solid
lines until they align with the Side 1 rectangle. Reprint to verify your adjustment.
Phaser 7700 Color Printer
Calibrate Margins
Phaser 7700 Color Printer
Calibrate Margins
Phaser 7700 Color Printer
Calibrate Margins
Phaser 7700 Color Printer
Calibrate Margins
B- B+
A+
A-
Phaser 7300
Cal
Phaser 7300
Cal
A
B
A
B
+
-
+
-
PHASER
®
7300 COLOR PRINTER
Calibrate for Margins (Short-Edge Feed)


