


Getting Started
Assigning an IP Address
44
14197L-001 Rev. A ZebraNet
®
10/100 Internal Print Server for ZM400 and ZM600 User Guide 04/19/2007
Setting the Default Gateway
These steps are optional.
To set the default gateway, complete these steps:
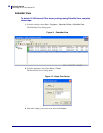
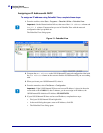
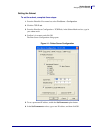
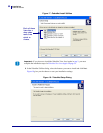
1. From the ZebraNet View menu bar, select PrintServer > Configuration.
2. Click the TCP/IP tab.
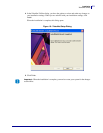
3. From the Print Server Configuration > TCP/IP tab, in the Default Gateway text-box, type
in your default gateway.
4. Confirm it is accurate, and click OK.
In a Non-Windows Environment
These steps can be used to assign an IP address using the control panel (LCD).
Assigning an IP address from the printer LCD
To assign an IP address from the printer LCD, complete these steps:
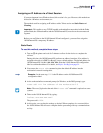
1. Turn on (I) the printer and wait until the LCD says PRINTER READY. If you do not have
a network cable in the port, the 10/100 Internal PS prints the configuration label when it is
ready.
2. On the printer control panel, press SETUP/EXIT.
3. On the printer control panel, press PREVIOUS until you reach the NETWORK SETTINGS
menu item.
4. You can edit any of the following network settings in order to communicate with any
10/100 Internal PS in your network environment.
• ip resolution (dynamic, permanent): The printer menu item IP RESOLUTION must
be set to
PERMANENT if attempting to assign the IP address from the control panel.
• default gateway (default setting of 000.000.000.000)
• subnet mask (default setting 255.255.255.0)
• ip address (if initial default setting is 0.0.0.0, after 2 minutes this defaults to
192.168.254.254)
• ip protocol (gleaning only, RARP, BOOTP, DHCP, DHCP and BOOTP, all)
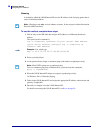
Important • To change any of these settings, you need to enter the printer password. The
default password is
1234.