PAGE 3
206-3700
CONTENTS
Safety Warnings
Safety Warnings . . . . . . . . . . . . . . . . . . . . . . . . . . . 2
Installation Overview
Installer’s Experience Level . . . . . . . . . . . . . . . . . . . 4
Installation Considerations . . . . . . . . . . . . . . . . . . . . 4
Power Cord Requirements . . . . . . . . . . . . . . . . . . . . . 4
Specifications
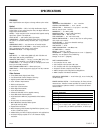
Specifications . . . . . . . . . . . . . . . . . . . . . . . . . . . . 5
Standard Connections
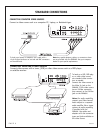
Connecting Computer Video Sources . . . . . . . . . . . . . . 6
Connecting Video and S-Video Sources . . . . . . . . . . . . 6
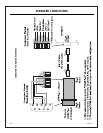
Connector Pin Wiring Reference . . . . . . . . . . . . . . . . . 7
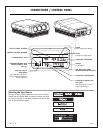
Connection / Control Panel . . . . . . . . . . . . . . . . . . . 8
Selecting Input Source . . . . . . . . . . . . . . . . . . . . . . 8
Remote Control
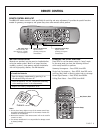
Battery Installation . . . . . . . . . . . . . . . . . . . . . . . . 9
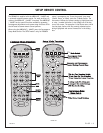
Choosing the Setup Function . . . . . . . . . . . . . . . . . . 9
Product Overview
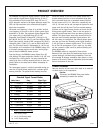
Product Overview . . . . . . . . . . . . . . . . . . . . . . . . . 10
Monitor Cabinet Removal . . . . . . . . . . . . . . . . . . . . 10
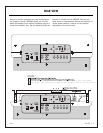
Monitor Rear View . . . . . . . . . . . . . . . . . . . . . . . . 11
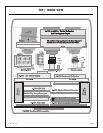
Monitor Top/ Inside View . . . . . . . . . . . . . . . . . . . . 12
Setup
Setup Remote Control Key Functions . . . . . . . . . . . . . 13
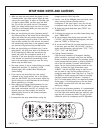
Setup Mode Notes and Cautions . . . . . . . . . . . . . . . . 14
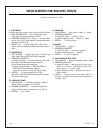
Specifications for RGB Sync Inputs . . . . . . . . . . . . . . 15
Notes . . . . . . . . . . . . . . . . . . . . . . . . . . . . . . . . . 16
Screen Size Selection . . . . . . . . . . . . . . . . . . . . . . 17
Setup and Alignment Procedure
Procedure Overview . . . . . . . . . . . . . . . . . . . . . . . . 18
I. Installation Prerequisites . . . . . . . . . . . . . . . . . . 18
II. System Check and Physical Setup . . . . . . . . . . . . . 18
Setup Reference Illustrations . . . . . . . . . . . . . . . . . 19
Physical Setup . . . . . . . . . . . . . . . . . . . . . . . . . . . 20
III. Preliminary Alignment Setup . . . . . . . . . . . . . . . 22
IV. Final Detailed Geometry Convergence Setup . . . . . . 24
V. Geometry/Convergence of Other Aspect Ratios . . . . . 24
Convergence Setup Controls . . . . . . . . . . . . . . . . . . 25
Geometry Convergence . . . . . . . . . . . . . . . . . . . . . . 26
Convergence of Red and Blue onto Green . . . . . . . . . . 27
Notes . . . . . . . . . . . . . . . . . . . . . . . . . . . . . . . . . 28
PLACEMENT CONSIDERATIONS
Room Light
Ideally, the PRO895X should be placed in a low-light envi-
ronment. Picture quality and the ability to see the project-
ed images are adversely affected by bright-light conditions.
Placement
Your PRO895X is shipped from the factory to provide an
image with an 80” width as a ceiling-mounted front projec-
tor. To ensure proper placement of the unit or to change
the size of the projection image, refer to the “Physical
Setup” section.
Viewing Surface
We recommend a good quality screen having a matte white
finish, which measures 80” in width (or more) diagonally.
Contact your local dealer for assistance in purchasing an
appropriate screen.
Note: Use of a projection screen designed for a single
light source projection system may result in significant
side-to-side color distortion.
Note to Installer
The purpose of this installation guide is to provide general guidelines for the proper installation and setup of the
PRO895X. Actual operation of the unit is described in the separately supplied Operating Guide and Warranty.
This guide has been prepared for properly trained installers.
Note: Design and specifications are subject to change without prior notification
©Copyright 2001 Zenith Electronics Corporation


