Installing Your Router
6
1. INSTALLING YOUR ROUTER
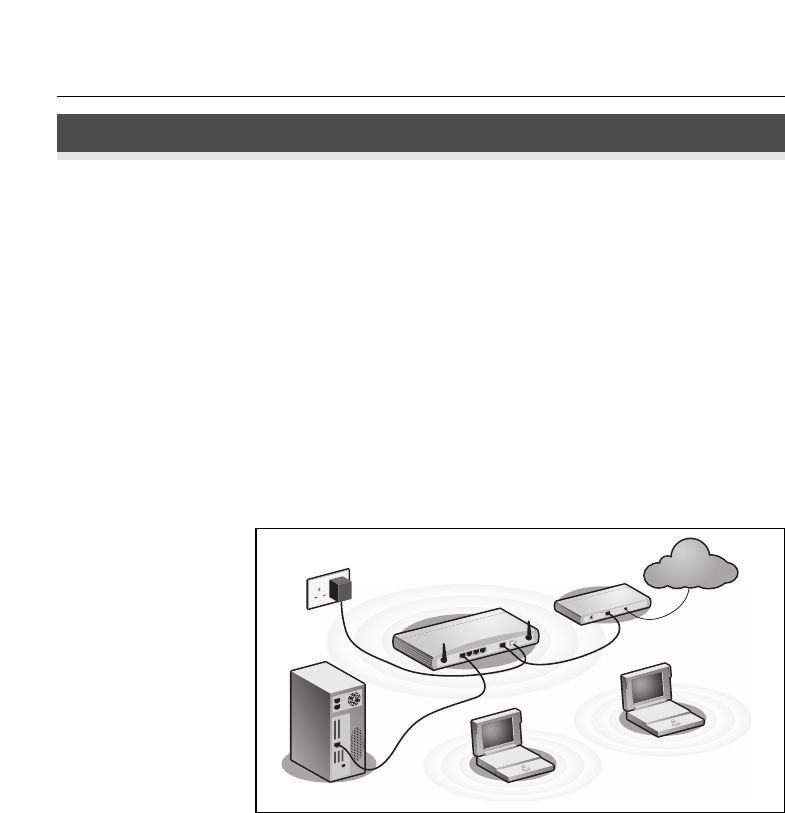
1. Connect the power adapter to the Router and wait for the Alert LED to
stop flashing.
2. Ensure that your modem and computer are both switched on.
3. Insert one end of the supplied Ethernet (RJ-45 Category 5) cable into the
Cable/DSL port on the rear panel of the Router.
4. Insert the other end of the cable into the RJ-45 port on your cable or DSL
modem. Check that the Cable/DSL status LED lights on the Router.
5. Connect the cable or DSL modem to the Internet.
6. Connect your computer to one of the four LAN ports on the Router using
an Ethernet cable. Check that the corresponding LAN status LED on the
Router lights.
To share your Router with more than four users you will need an additional
Hub or Switch. Connect a LAN port of your Router to the Hub or Switch, e.g.
OfficeConnect Dual Speed Switch 8.
Connecting Your Router
Connecting to a Hub or
Switch
In
te
rn
e
t
Your existing
Cable/DSL Modem
Power
Supply Unit
Your PC
Wireless
Users
3Com OfficeConnect Wireless
54Mbps/108Mbps 11g Cable/DSL Router
Figure 1. Example Network with OfficeConnect Wireless 54 Mbps/108 Mbps 11g Cable/DSL
Router.


