V6000 Analog Integrated Branch Office Solution Installation Guide
25
Making an FXS to FXO Call
The following setup requires two telephones (A and B) and three RJ-11 cables, using the
settings from the example shown in
Figure 5.
To make an FXS to FXO call, follow these 6 steps:
1 Connect telephone A to port 1 of module 1 (where module 1 is an FXS module).
2 Using an RJ-11 cable, connect port 2 of module 1 to port 1 of module 2 (where module 2
is the FXO module).
3 Connect telephone B to port 3 of module 1.
4 Offhook telephone A and dial 201 (port 1 of module 2 - FXO); you’ll receive a dial tone -
this dial tone is the equivalent of the PBX’s dial tone.
5 Dial 103 (the number configured for telephone B connected to port 3 of module 1 - FXS);
telephone B rings (the FXO module’s port 1 is outpulsing digits.
6 Offhook telephone B and test the line for voice.
Making a V6000 to MP-104 FXS Call
The following setup requires two telephones (A and B), two RJ-11 cables and an MP-104
gateway. Note that the V6000 and the MP-104 must be on the same subnet.
To make a V6000 to MP-104 FXS call, follow these 5 steps:
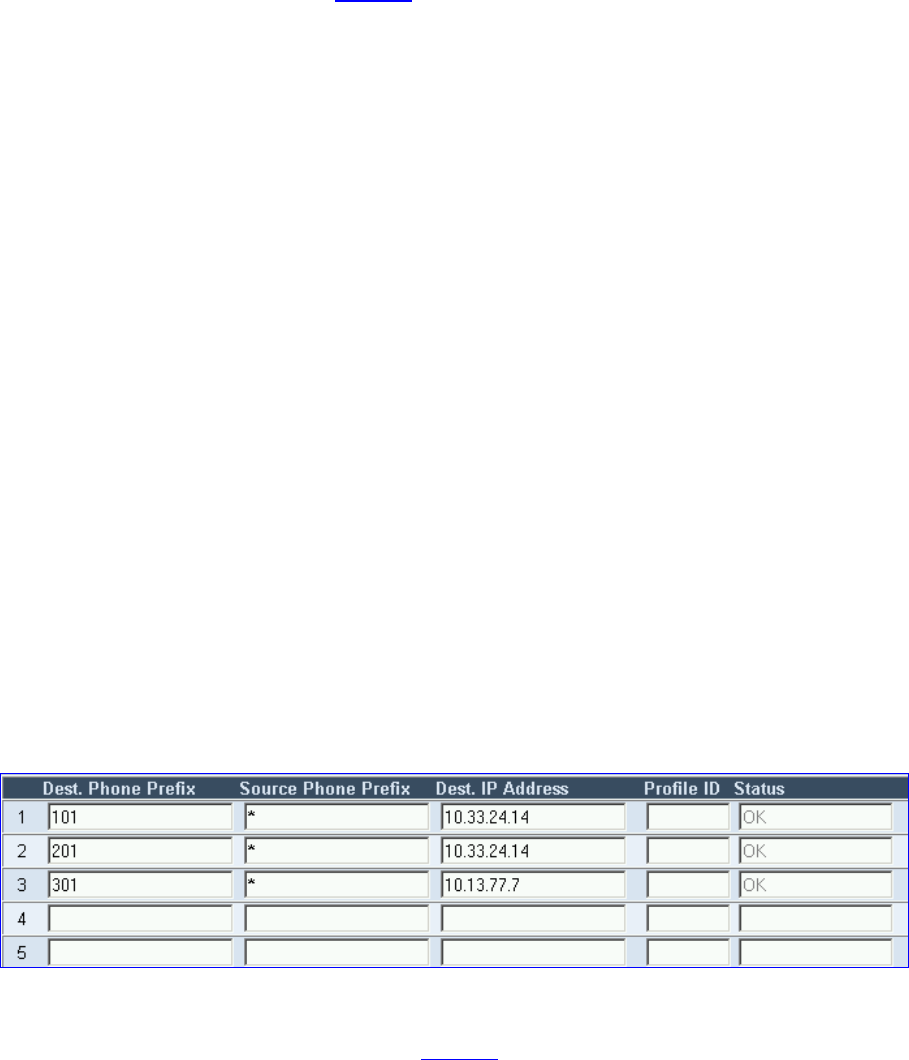
1 In the V6000 ‘Tel to IP Routing Table’ in row 3, under column ‘Dest. Phone Prefix’ enter
30, under column ‘Source Phone Prefix’ enter * (wildcard) and under column ‘Dest. IP
Address’ enter the IP address of the MP-104; every call that its destination number starts
with 30 is routed to the MP-104.
Figure 6 V6000 Tel to IP Routing Table
2 In the MP-104 ‘Endpoint Phone Number Table’ screen, in row 1, define 1-4 under column
‘Channel(s)’ and the first phone number, for example, 301, corresponding to channel 1,
under column ‘Phone Number’ (shown in
Figure 5). The phone numbers 302, 303 and
304 are automatically defined (in sequence), corresponding to subsequent channels.


