


9/92
6-1
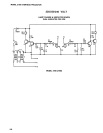
MODEL 2100 OVERHEAD PROJECTOR
SECTION 6 DISASSEMBLY/RE-ASSEMBLY
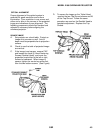
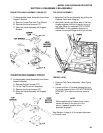
TOP COVER ASSEMBLY
1. Raise the Top Cover Assembly by pulling the
Release Lever and lifting up.
2. Using both hands, pull either one of the two
hinges outward until the hinge pin is out of
the hole. Slide the complete TOP COVER
ASSEMBLY in the opposite direction to
release the second hinge and lift up and out.
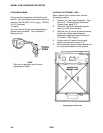
FRESNEL LENS
1. Remove Top Cover Assembly. (See Figure
above)
2. Loosen the four (4) screws holding the four
(4) corner clips and lens. DO NOT REMOVE
SCREWS. Turn clips to side and remove
lens.
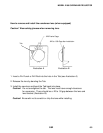
NOTE
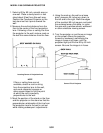
When replacing the Fresnel Lens, make
certain the bow in the lens is in the
convex (upward) position when
projector is upright.
See Section 4, page 4-4, for proper alignment
of Fresnel Lens.
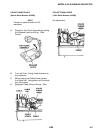
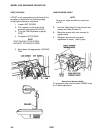
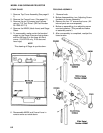
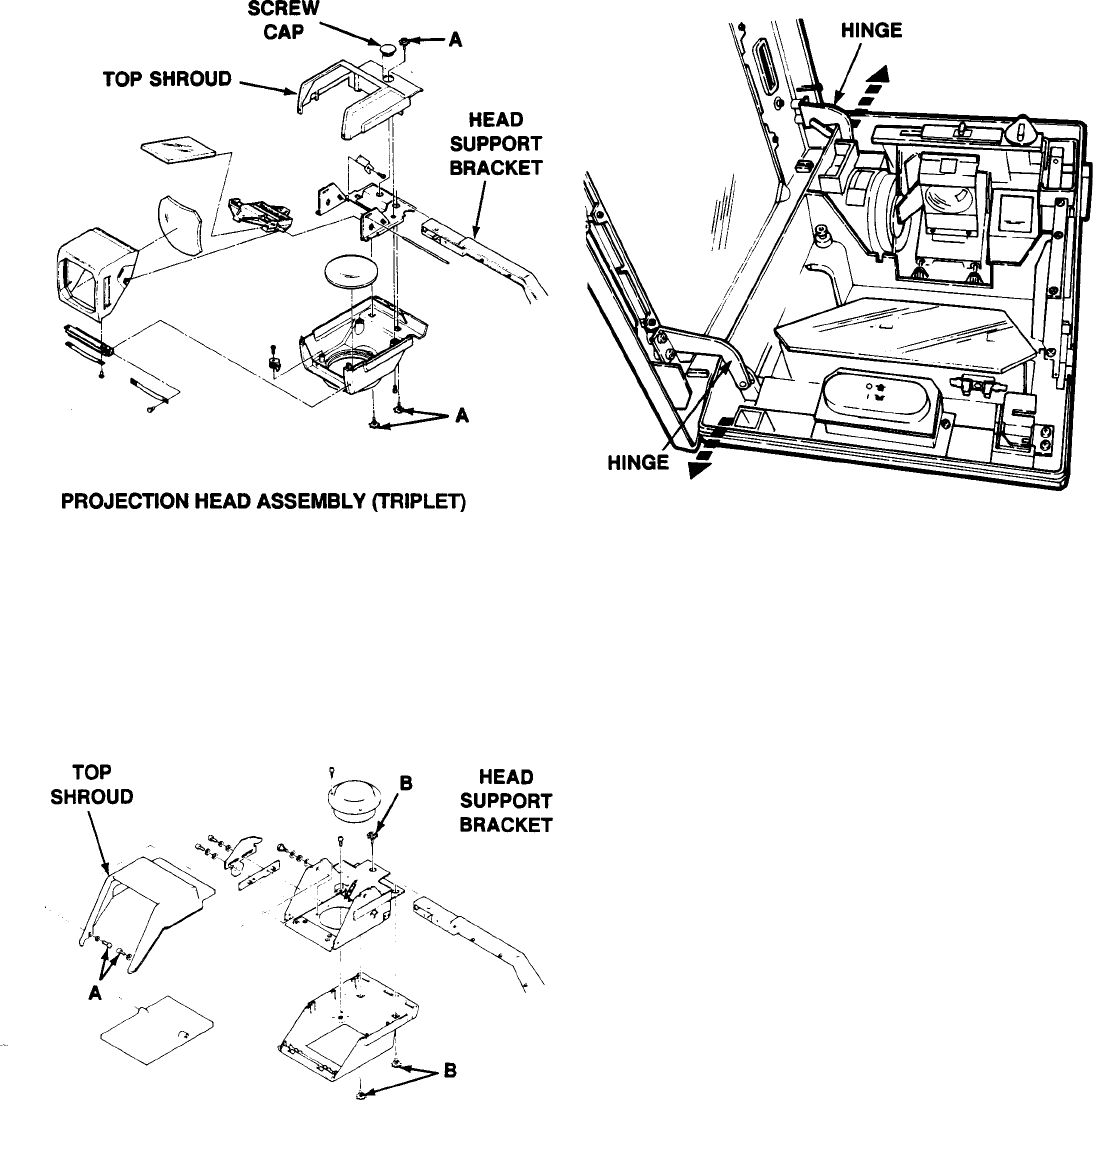
PROJECTION HEAD ASSEMBLY (DOUBLET)
1. To disassemble Head Assembly from Head
Support Bracket:
A. Remove Screw Cap from Top Shroud.
B. Remove the three screws (“A”).
C. Slide the Head Assembly off Support
Bracket.
2. To disassemble Head Assembly from Head
Support Bracket:
A. Remove the two screws (“A”).
B. Lift the Top Shroud off assembly.
C. Remove the three screws (“B”).
D. Slide the Head Assembly off Support
Bracket.