


9
3M 1997
3M Multimedia Projector MP8650
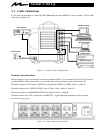
3-2. Projector Set Up
The meeting room is your operating environment and any stray light hitting the projection screen will become
glare. It is best to use a meeting room without wide-open windows. If there are “light stripes” from venetian
blinds, try to find a viewing area that’s away from them – and remember, the light stripes will move as the
hour changes.
Ambient Light
Whenever you have a choice, light the room from the rear, away from the projection screen. The MP8650 has
a brightness adjustment to achieve the best image possible.
Distance to Viewing Screen
The MP8650 can be used in a small or large meeting room to project a quality image from 51 cm (20 inches)
to 762 cm (300 inches) in size. The distance between the projector and the viewing screen and the zoom lense
setting (minimum to maximum) will determine the size of the projected image. Refer to the table in Section
9-3 to determine how far away from the viewing screen you need to place the projector to fill the screen with
the projected image.
Remember that increasing the projector-to-screen distance also decreases the image’s brightness dramatically.
In other words, as the image grows larger, it also grows dimmer.
For best results, experiment to find the right combination of projector-to-screen distance and room lighting.
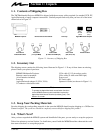
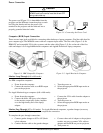
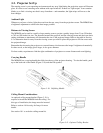
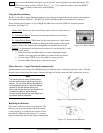
Carrying Handle
The MP8650 has a carrying handle that folds into the top of the projector housing. To raise the handle, push
up on the back end of the handle (Figure 3-10) and then lift upward.
Figure 3-10. Unfolding Handle
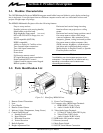
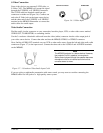
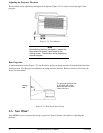
Ceiling Mount Considerations
An optional ceiling mount bracket (Figure 3-11) is
required to install the MP8650 from the ceiling. For
this type of installation, the image must be inverted.
Refer to section 4-6 Inverting the Image for more
details.
See section 10-1 to order the ceiling mount kit.
Figure 3-11. Optional Ceiling Bracket