


13
3M 1997
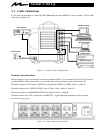
3M Multimedia Projector MP8650
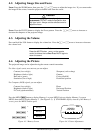
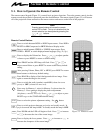
Press the SELECT button
SELECT
to display the first picture adjustment setting for Memory 1, 2 or 3. (See
Figure 4-4). Press
or to adjust this line or press SELECT again to display the next picture
adjustment setting or press RESET
to use the STANDARD default settings.
Note
Using the standard default settings does not affect
the Memory 1, Memory 2 or Memory 3 settings.
4-5. Memory Function
In addition to the standard factory default picture settings, the MP8650 will retain in memory, up to three
different picture settings for RGB and Video input sources. If you use the MP8650 projector in meeting rooms
that have different lighting considerations, you can adjust the picture for optimum performance and then save
these settings under Memory 1 or Memory 2 or Memory 3 modes. Storing picture settings in memory will
reduce the amount of setup time needed before a multimedia presentation.
To store picture settings in Memory menu:
1. Setup the MP8650 to project an image from the
first input source (RGB1 or RGB2 or Video1 or
Video2).
2. Press MENU to display STANDARD.
3. Now press MENU once for Memory 1 or twice
for Memory 2 or three times for Memory 3
mode.
4. Press SELECT (once, twice, etc.) to display each
picture setting that can be adjusted for the
Memory 1, 2 or 3 mode ( see Step 3) or press
RESET to use the factory defaults. Using the
STANDARD factory defaults will not affect the
Memory 1, 2, or 3 settings.
5. Press the + or – arrow to change each setting to
produce the best picture.
6. Continue to press SELECT, then + or – until all
the picture settings for the Memory 1, 2 or 3
mode (selected in Step 3) are properly set.
7. Press Menu to display the next Memory mode.
8. Move the projector to the next presentation room
and repeat Steps 1-7 to record different picture
settings for the next Memory mode.
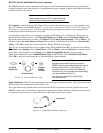
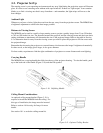
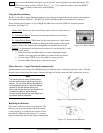
4-6. Inverting the Image
The image can be inverted for ceiling mounted applications. Press the HORIZONTAL or VERTICAL button
on the projector control panel to invert the image left to right or top to bottom. Press again to invert the image
back.
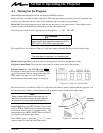
4-7. Image Position
The computer (RGB) image can be moved vertically or horizontally to center it on the projection screen. On
the remote control, press the H/V button once, then press and hold the
or arrow to set the horizontal
(left/right) position or press the H/V button twice, then press and hold the
or arrow to set the vertical
(up/down) position.
Note
For video input, only the horizontal position can be
adjusted.
4-8. Video System
The MP8650 has an automatic video detection function that will select the correct video system for NTSC,
PAL or SECAM.