


11
3M 1997
3M Multimedia Projector MP8650
Section 4: Operating the Projector
4-1. Turning On the Projector
Read the Important Safeguards before operating the MP8650 projector.
Refer to Section 3 to make all cable connections. When the input cables and power cords are connected, turn
on the power, adjust the size and focus of the projected image and begin your presentation.
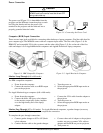
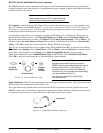
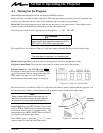
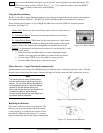
Power On: Turn on the projector power, then turn on the power to your input sources. The projector power
switch is located on the backside of the projector in the lower right corner.
Press the power switch to ON to apply power to the projector. | = ON O = OFF
!
Caution
Allow a projector that has been stored in a cold
place to warm up to operating temperature 0°C to
35°C (32°F to 95°F) before applying power.
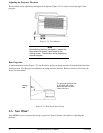
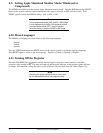
The Standby/Power-On indicator (Figure 4-1) will turn amber, indicating the unit is in the standby mode.
Note
The lamp does not energize in the standby mode.
Remove Lens Cap: Remove the lens cap from the projection lens before energizing the lamp.
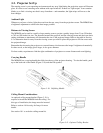
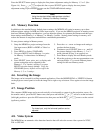
Projector Control Panel: The projector control panel is located on the side of the projector.
Energize Lamp: Press the POWER button
. . .
. . .
on
the projector control panel or the STANDBY button
on the remote control to energize the lamp. The
Lamp indicator (Figure 4-2) will turn green to
indicate that the metal halide lamp is warming up.
Figure 4-1. Projector Control Panel
The Standby/Power-On indicator (Figure 4-2) will turn from amber to green to indicate that the projector is in
the operating mode. It takes a few moments for the projection lamp to reach its full light output.
Note
When a metal halide lamp is first turned on, it is
normal for it to make noise as the gas inside the
bulb heats to the proper operating temperature.
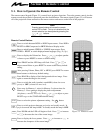
Select Input: Press the INPUT button on the control
panel or RGB or VIDEO button on the remote control
to select the desired video or computer source. The
current input source (RGB1, RGB2, Video1 or Video2)
will display in the upper right corner.
Press INPUT again or press the
or arrow
(remote control) to select the next input source.
Temperature
Lamp
Standby/
Power-On
Figure 4-2. Indicator Lamps