


3 System upgrade
58
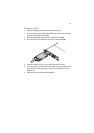
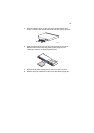
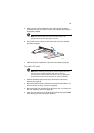
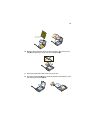
To install the PCI riser assembly:
1 Observe the ESD precautions and pre-installation instructions
described on page 39.
2 Lower the PCI riser assembly (A), aligning the four hooks on the
back edge of the riser assembly with the matching slots on the rear
of the chassis (B).
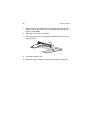
3 Press down on the assembly until the four hooks on the rear of the
riser assembly engage the chassis rear panel slots. The riser cards
will seat into the matching sockets on the mainboard.
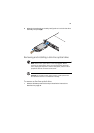
4 Connect the cables to the installed PCI card.
5 Observe the post-installation instructions described on page 40.
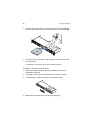
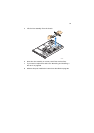
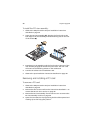
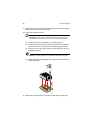
Removing and installing a PCI card
To remove a PCI card:
1 Observe the ESD precautions and pre-installation instructions
described on page 39.
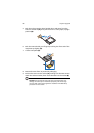
2 Remove the CPU air duct. Perform the instructions described in “To
remove the CPU air duct” section on page 45.
3 Remove the PCI riser assembly from the server. See “To remove the
PCI riser assembly” section on page 56.
4 Open the rear retention clip by pushing the blue slide upward and
rotating clip to the fully open position.