7
For Windows NT 4.0 Installation
Remove all other modem drivers from your operating system. On the Start menu,
click Settings then click Control Panel. In Control Panel, double-click on the Mo-
dems icon. Select the modem you wish to remove and click Remove. Turn off the
computer and physically remove the modem from your system. Do not install your
new modem at this time. Follow the procedures below. Once you remove the old mo-
dem and its drivers from your system, you will need the old modem driver diskette if you
wish to reinstall it at a later date.
On the Start menu, click Programs, then click Administrative Tools, then click Win-
dows NT Diagnostics. Click the Version tab. “Service Pack 3” (or greater) should be
installed in Windows NT 4.0.
Before installing the modem, you must enable ISA Plug-N-Play support within Win-
dows NT. First set your system BIOS to “PnP OS” and then insert the Windows NT
4.0 CD-ROM into your systems CD-ROM Drive. The Startup window for Win-
dows NT 4.0 should appear after a few moments. Click Browse This CD. Double-
click the Drvlib folder. From the new panel double-click on the Pnpisa folder. An-
other panel will appear. Double-click on the x86 folder. The contents of this folder
should contain a file labeled Pnpisa. Right-click the file’s icon and a pop-up menu
will appear. From this menu click Install. After ISA Plug-N-Play is enabled, restart
your system. When the system has restarted, in Control Panel double-click on the
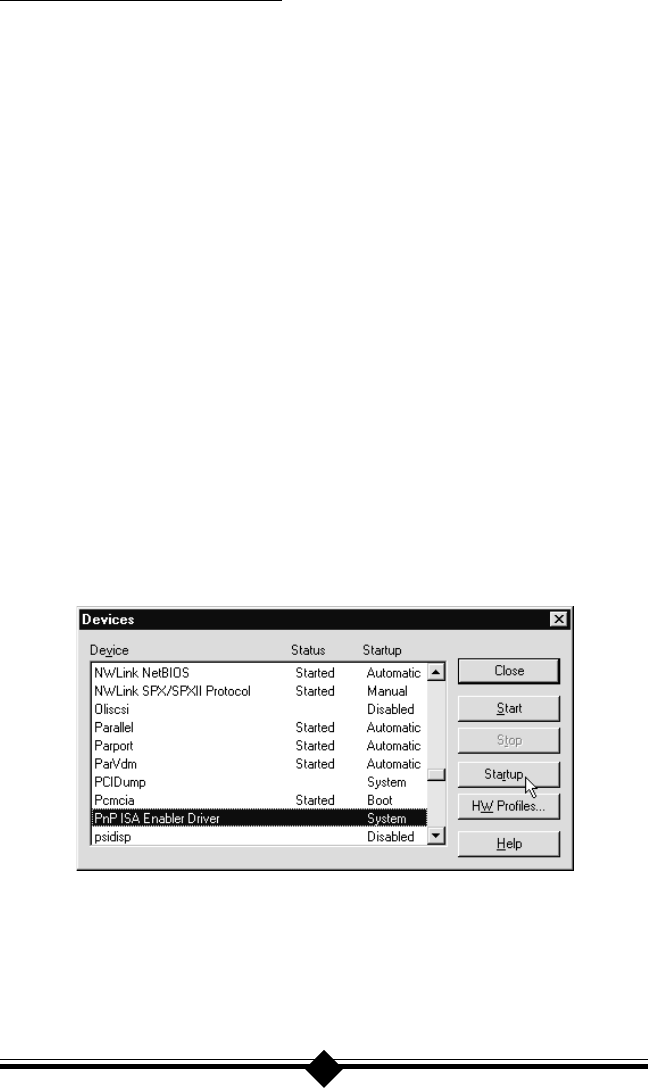
Devices icon. Scroll down the new menu and highlight PnP ISA Enabler Driver.
Click the Startup button and select the System option. See Fig.4 below.
Fig. 4: Devices Window
Proceed to the section titled “Installing the Modem.”
