Appendix C: Using the ARC Utility ● 66
Deleting Arrays
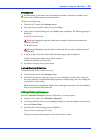
Caution:
Back up the data on an array before you delete it. Otherwise, all data on the
array is lost. Deleted arrays cannot be restored.
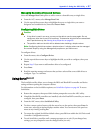
To delete an existing array:
1 From the ACU menu, select Manage Arrays.
2 Select the array you wish to delete, then press Delete.
3 In the Array Properties dialog box, select Delete, then press Enter. The following prompt is
displayed:
For RAID 1 and 10 arrays:
Warning:
Deleting the array will render array unusable. Do you want to delete the
array? (Yes/No):
For RAID 0 arrays:
Warning:
Deleting the array will result in data loss! Do you want to delete the array?
(Yes/No):
4
If you press Ye s , select the member when the following prompt is displayed:
To delete the partition table, choose which member:
member #0, member #1, both, none
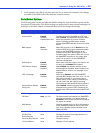
5 Press Esc to return to the previous menu.
Enabling/Disabling Write Cache
To Enable/Disable Write Cache for an array:
1 From the Main menu, select Manage Arrays.
2 From the List of Arrays, select the array you want to modify the Write Cache setting for,
then press Ctrl+W. A confirmation dialog appears to modify setting. Press Y to change the
current Write Cache setting.
Note:
Write Cache is disabled by default when creating all array types. The disk operation
may be very slow with Write Cache off.
Adding/Deleting Hotspares
Select the Add/Delete Hotspares option to add, delete, or view hot spares.
1 From the ACU menu, select Add/Delete Hotspares.
2 Use the up and down arrow keys to highlight the disk you want to designate as a hot spare,
then select Insert>Enter.
3 Press Ye s when the following prompt is displayed:
Do you want to create spare? (Yes/No)
The Spare you have selected appears in the Selected Drive menu.
!


