


Chapter 2 Installing CoreModule 420 Options
CoreModule 420 QuickStart Guide 15
CAUTION To prevent damage to the CoreModule 420 or the CompactFlash card, do not
touch the either one without first discharging yourself and following good
Electro Static Prevention principals. The CoreModule 420 and the
CompactFlash card are sensitive to static electricity and can be easily damaged
by improper handling. Do the following when handling either one:
Leave the CompactFlash in the anti-static bag until you are ready to install it.
Always use an anti-static wrist/ankle strap and a grounding mat.
Before you remove a CompactFlash from the anti-static bag, touch a grounded,
unpainted metal surface to discharge any static electricity.
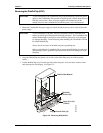
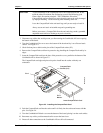
3. Disconnect any cables that would prevent you from turning the CoreModule 420 over exposing
the bottom of the board.
4. Turn the CoreModule 420 over to access the bottom of the board and lay it on a flat anti-static
surface. See Figure 2-4.
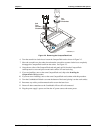
5. Check for bent pins or debris on the pins of the CompactFlash socket (J12).
6. Remove the CompactFlash card from its protective bag, handling the CompactFlash card by its
edges.
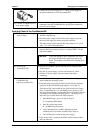
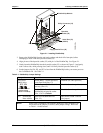
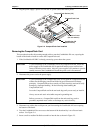
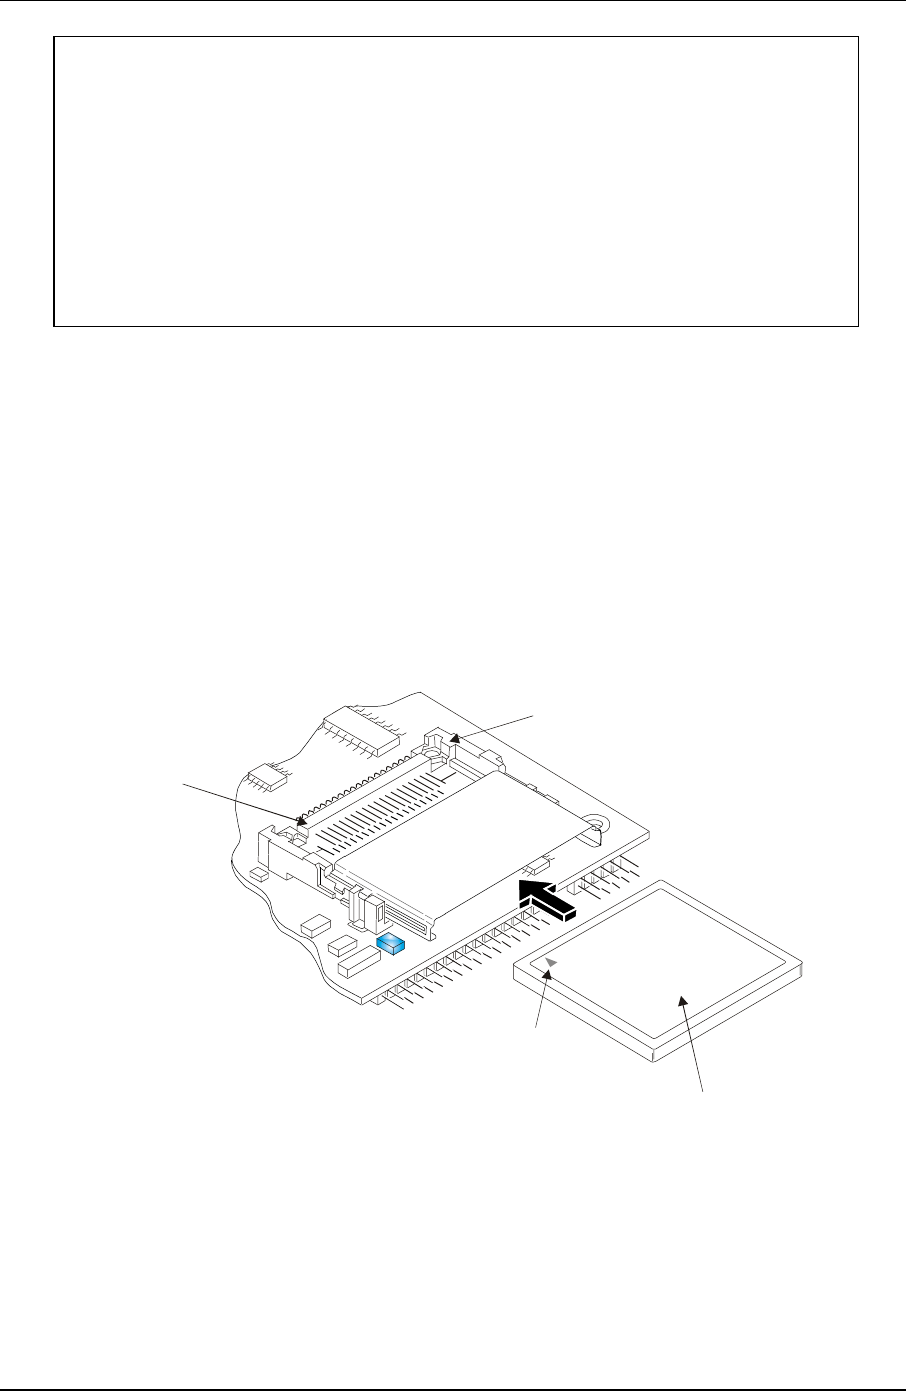
7. Insert the CompactFlash card into the slots of the protective cover, parallel to the bottom of the
CoreModule 420 as shown in Figure 2-3.
The CompactFlash card edge and pins are keyed to install into the socket with only one
orientation.
Insert CompactFlash Card
Pin-1
Marker
Pin-1
CompactFlash
Socket (J12)
CM420QkS_05a
Figure 2-3. Installing the CompactFlash Card
8. Push the CompactFlash card into the socket until it is firmly into the socket and mates with the
pins. See Figure 2-4.
9. Turn the CoreModule 420 back over onto the bottom of the board, placing it on the work surface.
10. Reconnect any cables you disconnected earlier to turn the board over.
11. Ensure all other connections to the CoreModule 420 are still well connected.