


Chapter 2 Installing CoreModule 420 Options
16 QuickStart Guide CoreModule 420
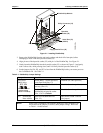
12. Plug the power supply’s power cord into the AC power source and restore power.
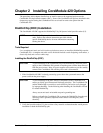
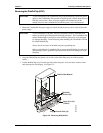
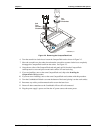
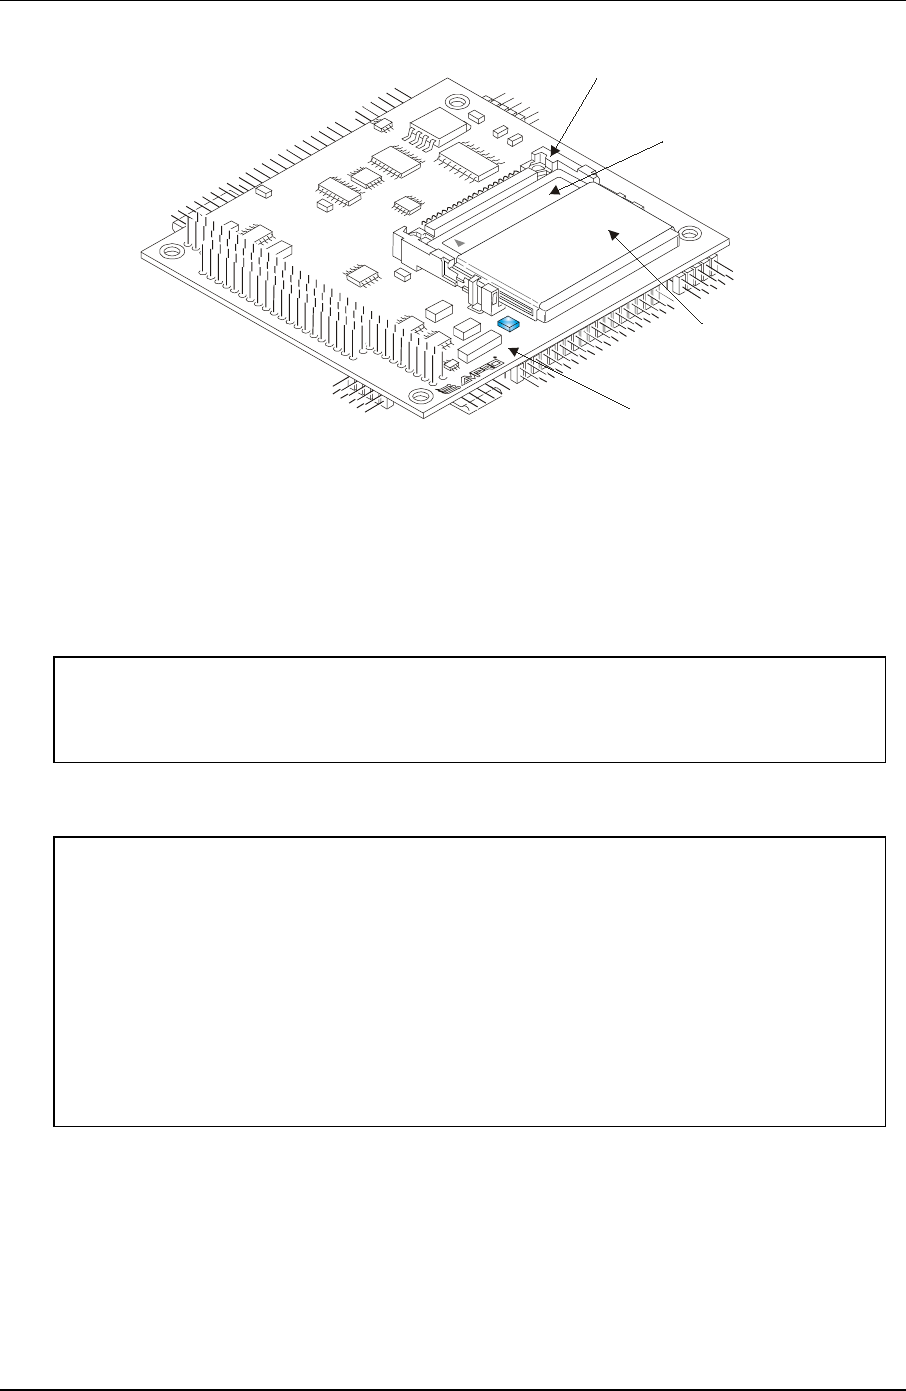
CoreModue 420
(Bottom View)
Protective Cover
(Do not remove)
CompactFlash Card
CompactFlash Socket (J12)
CM420QkS_06a
Figure 2-4. CompactFlash Card Installed
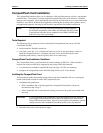
Removing the CompactFlash Card
This procedure describes discounting enough cables to turn the CoreModule 420 over, exposing the
bottom of the board to install or remove the CompactFlash card.
1. If the CoreModule 420 SBC is already powered up, power down the system.
CAUTION To prevent damage to the CoreModule 420 or the CompactFlash card, ensure the
power supply to the CoreModule 420 is turned off and the power cord has been
removed from the power source. Most AT power supplies will continue to provide
standby current to the CoreModule 420 until the power cord is disconnected.
2. Disconnect the power cord to the power supply.
CAUTION To prevent damage to the CompactFlash card, do not touch the CompactFlash card
without first discharging yourself and following good Electrostatic Discharge
principals. CompactFlash cards are sensitive to static electricity and can be easily
damaged by improper handling. Do the following when handling the
CompactFlash card:
Leave the CompactFlash card in the anti-static bag until you are ready to install it.
Always use an anti-static wrist/ankle strap and a grounding mat.
Before you remove a CompactFlash card from the anti-static bag, touch a
grounded, unpainted metal surface to discharge any static electricity.
3. Disconnect any cables that would prevent you from turning the CoreModule 420 over exposing
the bottom of the board.
4. Turn the CoreModule 420 over to access the bottom of the board and lay it on a flat anti-static
surface. See Figure 2-4.
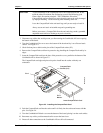
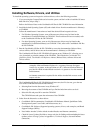
5. Insert a small to medium flat blade screwdriver into the slot as shown in Figure 2-5.