


Initial Configuration and Firmware Upgrade
8
NI Series WebConsole & Programming Guide
Assigning a Static IP to the NI Controller
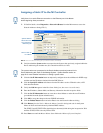
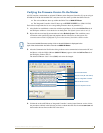
1. In NetLinx Studio, select Diagnostics > Network Addresses from the Main menu to access the
Network Addresses dialog (FIG. 3).
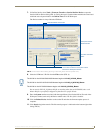
2. Verify that both the System number corresponds to the System value previously assigned within the
Device Addressing tab and that zero (0) is entered into the Device field.
3. Click the Get IP Information button to temporarily configure the on-board Master for DHCP usage
and then read the IP Address obtained from the DHCP Server.
4. Click the Specify IP Address radio button from the IP Address section. With this action, all IP
fields become editable.
5. Verify that NetLinx appears in the Host Name field (if not, then enter it in at this time).
6. Enter the IP Address, Subnet Mask, and Gateway information into their respective fields.
7. Click the Set IP Information button to cause the on-board Master to retain this new IP Address
(pre-obtained from the System Administrator).
8. Click OK to accept the change to the new IP/DNS information.
9. Click the Reboot Master button and select Ye s to close the Network Addresses dialog.
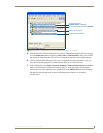
10. Click Reboot (from the Tools > Reboot the Master Controller dialog) and wait for the System
Master to reboot and retain the newly obtained DHCP Address.
The STATUS and OUTPUT LEDs should begin to alternately blink during the incorporation. Wait
until the STATUS LED is the only LED to blink.
11. Press Done once until the Master Reboot Status field reads *Reboot of System Complete*.
Verify there is an active Ethernet connection on the Ethernet port of the Master
before beginning these procedures.
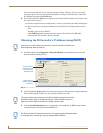
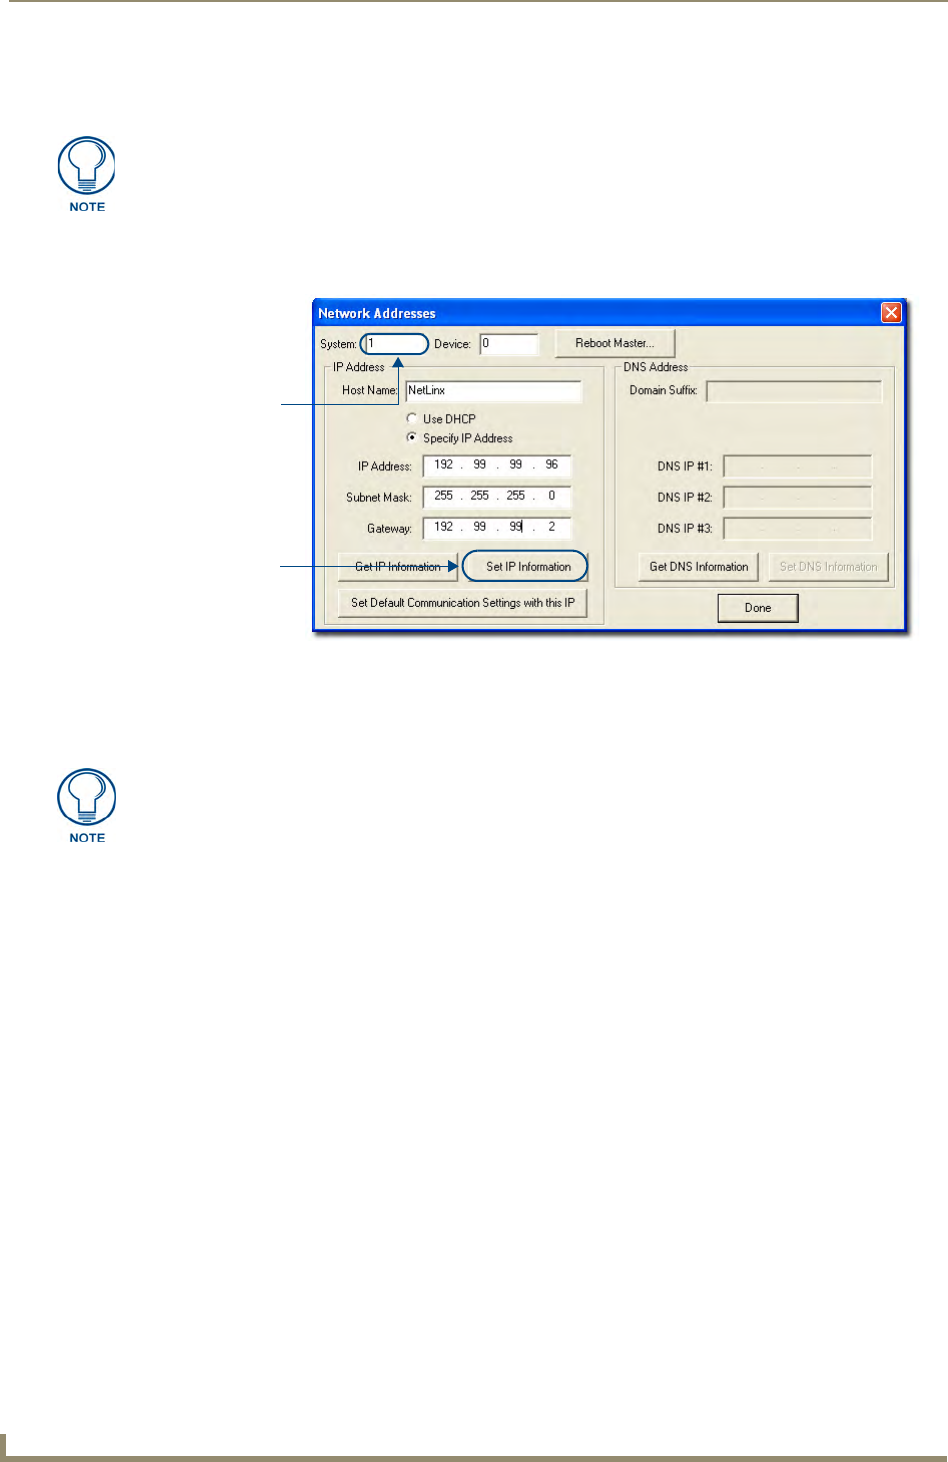
FIG. 3 Network Addresses dialog (for a pre-obtained Static IP Address)
System Address
reflects the value
set in the Device
Addressing tab
Used to retain an
IP Address
The system value must correspond to the Device Address previously entered in the
Device Addressing tab. Refer to the Manage System - System Number section on
page 42 for more detailed instructions on setting a system value.