


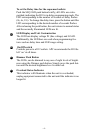

- 11 -
Installation
The installation of the H10 consists of the following steps:
1. Make connections
2. Apply power
3. Set up the H10
Make Connections
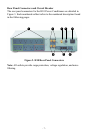
Prior to connecting equipment to the H10 Power Conditioner, ensure the
unit is functional by connecting the AC Power Cord (provided) at the rear
panel ( , Figure 3). Once power is applied to the unit, and the unit is
powered on, the front panel LEDs will illuminate. Turn the power switch
off - all LEDs extinguish.
Note: Due to the unique filtering and surge protection provided by the
H10, APC recommends connecting AV components as noted on the rear
panel of the unit (Figure 3).
Connect your AV components as noted on the rear panel, and as defined in
the section “REAR PANEL CONNECTORS and CIRCUIT BREAKER”. To
ensure ground loops are eliminated, thus eliminating an audible hum
through your speaker system, ground all AV components to the Ground
System terminal located on the rear panel of the unit ( , Figure 3).
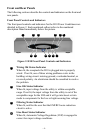
Apply Power
Apply power to the H10 by pressing the front panel Power Switch ( ,
Figure 2) fully inward, then releasing the switch. Once power is applied to
the unit, the front panel LEDs are illuminated.
5
3
9