


3
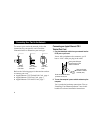
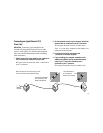
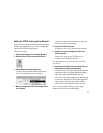
IMPORTANT
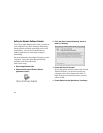
If you’re installing the Apple Ethernet
CS II Thin Coax Card, a T-connector is connected to
your card. Before you install the card, twist the
T-connector to unlock it from your card and set
it aside.
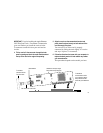
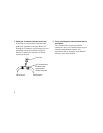
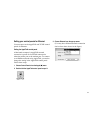
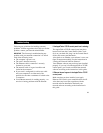
4. Tilt the card to fit the connector through the back
panel’s opening and hook the small metal bracket at
the top of the card to the edge of the opening.
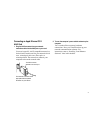
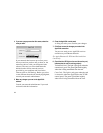
5. Align the card over the communications slot and
press down firmly and evenly on both ends until the
card fits snugly into place.
You can test to see if the card is properly
connected by lifting the card slightly. If it resists
and stays in place, it’s connected.
6. Follow the directions that came with your computer to
replace the back panel or lid and reattach any cables
you removed earlier.
This procedure depends on the model you have.
To locate the
communication slot for
your computer, see the
setup instructions that
came with your Macintosh.
Handle the card by its edge.
Push down evenly and firmly.
T-connector
removed from the
Thin Coax card
Port on the Thin Coax card
Metal bracket