


81
5. SOFTWARE SETUP
ASUS A7V266-EX User’s Manual
5. S/W SETUP
5.4.1 Installing the Hard Disks
The RAID 0 setting allows users to reformat two hard disks with the same new OS
simultaneously. RAID 1 arrays can use a pre-existing hard disk along with a blank
hard disk, or two new hard disks.
1. Install the first and second hard disk into the hard disk bays of your system.
Connect each hard disk drive with a separate UltraDMA/100 cable, one to the
Promise IDE1 connector, and the other to the Promise IDE2 connector onboard
the A7V266-EX. NOTE: Do not connect any other types of IDE devices to the
Promise IDE connectors; they support hard disk drive devices only.
2. Connect the power cables to the hard disks.
3. Make sure the RAID_EN jumper is reset to [1-2] and, if available, ensure the
BIOS settings in the Advanced PCI Configuration sub-menu are set to enable
RAID arrays: “SCSI/ATA100 Boot Sequence” field should be set to [ATA100/
SCSI] and the “Load Onboard ATA BIOS” field should be set to [Auto].
4. Boot-up the PC.
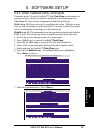
5.4.2
Enter MBFastTrak133 BIOS and FastBuild Utility
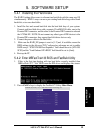
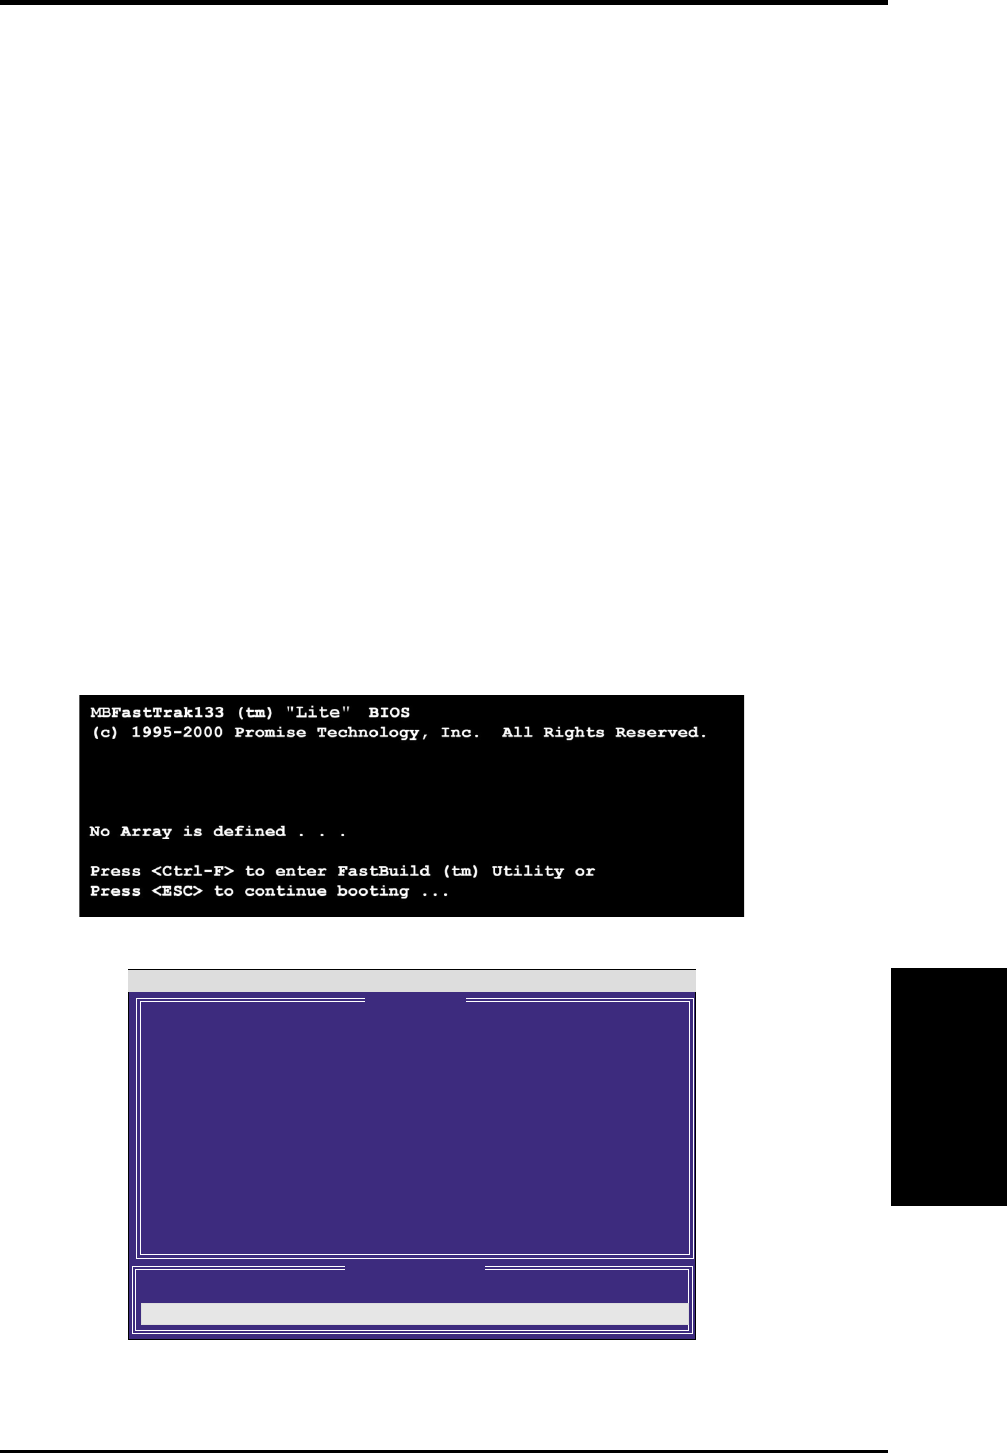
1. If this is the first time booting with two hard disks correctly installed, then
MBFastTrak133™ “Lite” BIOS scans the IDE drives and displays this screen:
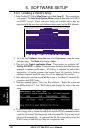
2
. Press <Ctrl-F> keys to display the FastBuild™ Utility Main Menu:
RAID
FastBuild (tm) Utility 1.31 (c) 1996-2000 Promise Technology, Inc.
Auto Setup . . . . . . . . . . [ 1 ]
[ 1 ]
View Drive Assignments . . . . [ 2 ]
[ 2 ]
View Array . . . . . . . . . . [ 3 ]
[ 3 ]
Delete Array . . . . . . . . . [ 4 ]
[ 4 ]
Rebuild Array. . . . . . . . . [ 5 ]
[ 5 ]
Controller Configuration . . . [ 6 ]
[ 6 ]
Press 1..6 to select Option [ESC] Exit
[ Main Menu ]
[ Keys Available ]