


3-6 Chapter 3: BIOS setup
Chapter 3
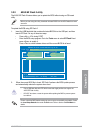
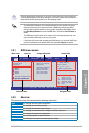
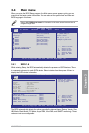
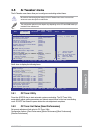
3.3 BIOS setup program
Use the BIOS Setup program to update the BIOS or congure its parameters. The BIOS
screens include navigation keys and brief online help to guide you in using the BIOS Setup
program.
Entering BIOS Setup at startup
To enter BIOS Setup at startup:
• Press <Delete> during the Power-On Self-Test (POST). If you do not press <Delete>,
POST continues with its routines.
Entering BIOS Setup after POST
To enter BIOS Setup after POST:
• Press <Ctrl>+<Alt>+<Del> simultaneously.
• Press the reset button on the system chassis.
• Press the power button to turn the system off then back on. Do this option only if you failed
to enter BIOS Setup using the rst two options.
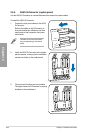
3.2.3 ASUS CrashFree BIOS 3 utility
The ASUS CrashFree BIOS 3 utility is an auto recovery tool that allows you to restore the
BIOS le when it fails or gets corrupted during the updating process. You can restore a
corrupted BIOS le using the motherboard support DVD or a USB ash drive that contains
the BIOS le.
The BIOS le in the motherboard support DVD may be older than the BIOS le published
on the ASUS ofcial website. If you want to use the newer BIOS le, download the le at
support.asus.com and save it to a USB ash drive.
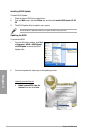
Recovering the BIOS
To recover the BIOS
1. Turn on the system.
2. Insert the motherboard support DVD to the optical drive, or the USB ash drive
containing the BIOS le to the USB port.
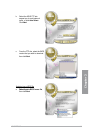
3. The utility automatically checks the devices for the BIOS le. When found, the utility
reads the BIOS le and starts ashing the corrupted BIOS le.
4. Turn off the system after the utility completes the updating process and power on
again.
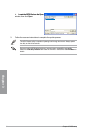
5. The system requires you to enter BIOS Setup to recover BIOS setting. To ensure
system compatibility and stability, we recommend that you press <F2> to load default
BIOS values.
DO NOT shut down or reset the system while recovering the BIOS! Doing so can cause
system boot failure!