2-192-19
2-192-19
2-19
ASUS T2-AE1ASUS T2-AE1
ASUS T2-AE1ASUS T2-AE1
ASUS T2-AE1
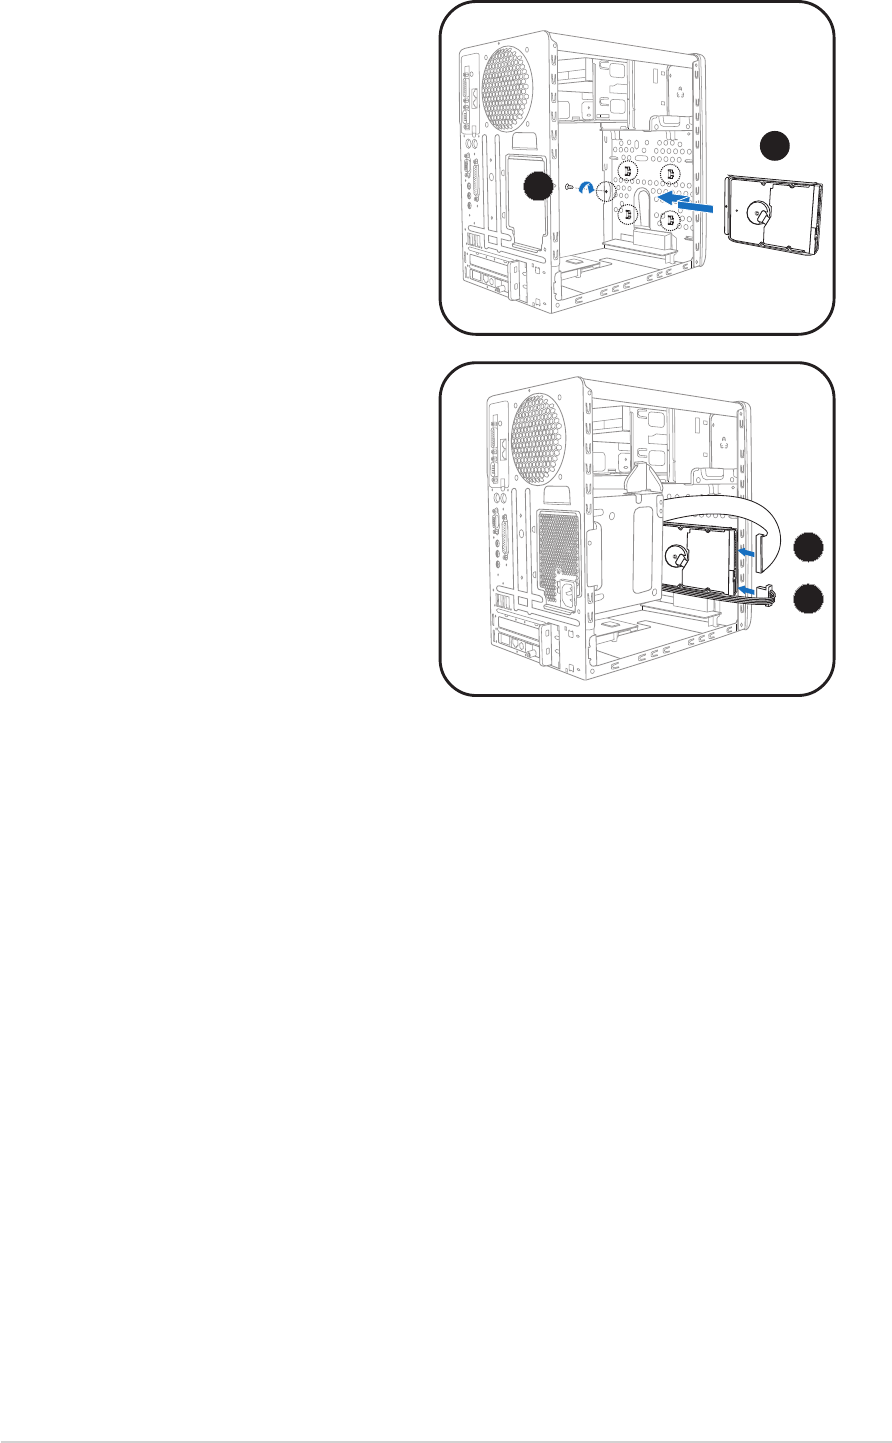
6. Reinstall the tray and the HDD
to the chassis by locking the
tray slots to the chassis hooks.
7. Secure the tray with the screw
you removed earlier.
8. Connect one end of the 40-pin
IDE cable to the IDE connector
on the drive.
9. Connect a 4-pin power plug
from the power supply unit to
the HDD power connector.
10. Connect the other end of the
IDE ribbon cable to the primary
IDE connector (blue connector
labeled PRI_IDE) on the
motherboard. See page 4-8 for
the location of the primary IDE
connector.
66
66
6
77
77
7
88
88
8
99
99
9
To install a Serial ATA hard disk drive:
1. Follow steps 1-7 of the previous section.
2. Connect one end of the supplied 7-pin SATA cable to the SATA
connector at the back of the drive, then connect the other end to a
SATA connector on the motherboard. See page 4-9 for the location of
the Serial ATA connectors.
3. Connect the 15-pin SATA power adapter plug to the power connector
at the back of the drive, then connect the other end (4-pin male) to a
4-pin (female) power plug from the power supply unit.


