


Configuration Possibilities
124 AXIS 5500 / AXIS 5550 User’s Manual
Enabling the SNMPv3 Protocol
Invoke the print server’s Web interface to enable the SNMPv3 protocol.
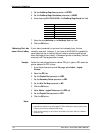
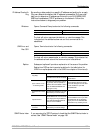
1. Select Admin | Network Settings | Detailed View | TCP/IP Network and
ensure that HTTPS Enabled is set to yes to guarantee a secure
configuration.
Note: You must have a valid certificate loaded to be able to enable HTTPS.
See “Enabling SSL via the Web Interface” on page 121.
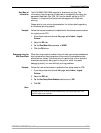
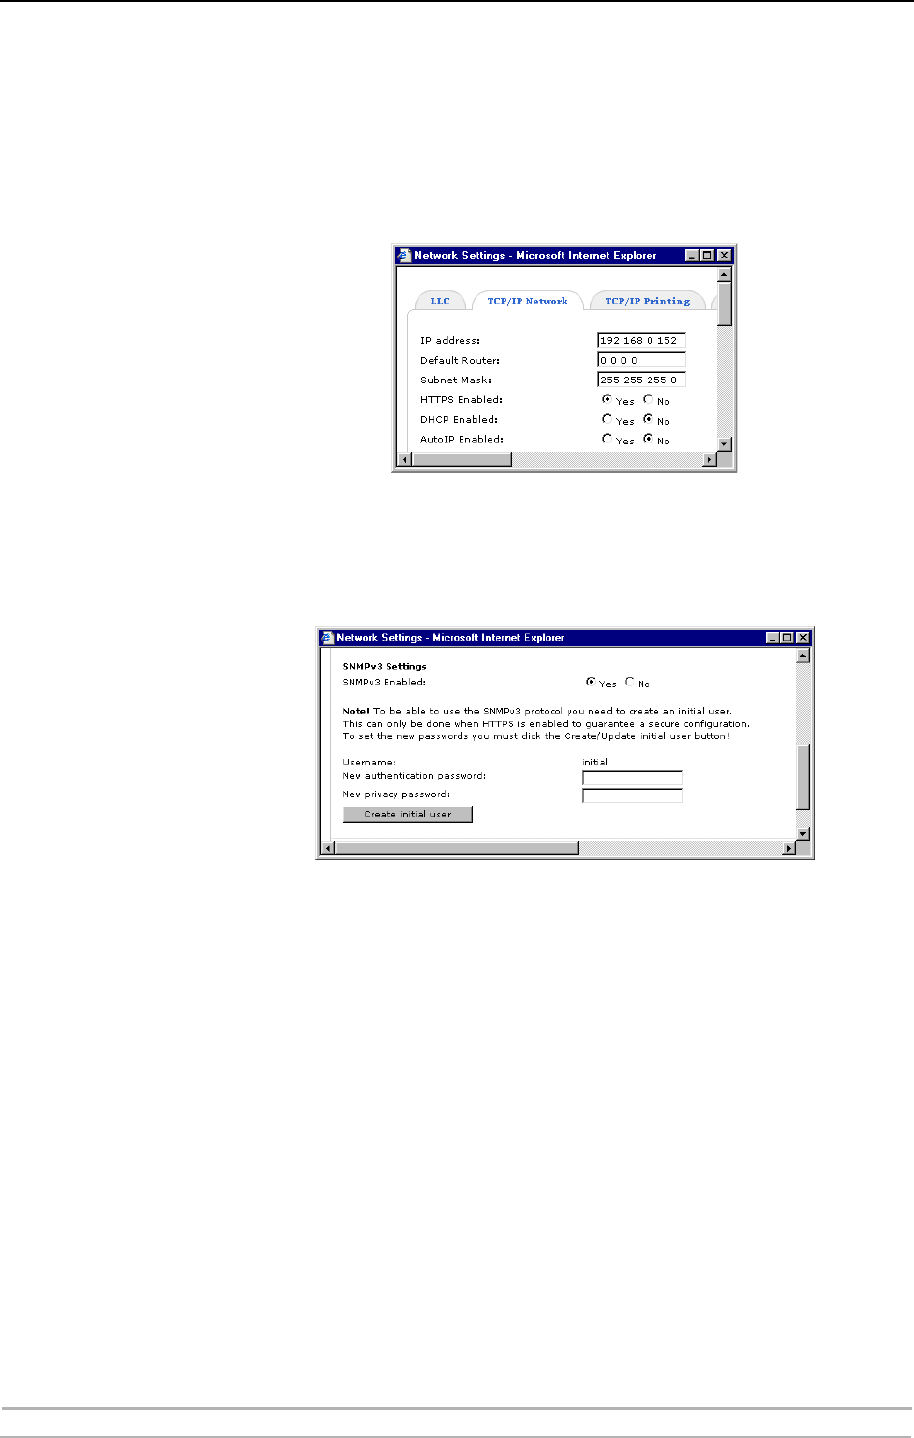
2. Select Admin | Network Settings | Detailed View | SNMP and set SNMPv3
Enabled to yes.
3. Create an initial user by entering two new passwords: one authentication
password and one privacy password. Each password must consist of at least
8 characters.
4. Click the Create initial user button.
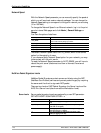
Now your print server is ready to accept communication according to the
SNMPv3 protocol. For further management you will need an SNMPv3
management application; you use this application to configure the print
server, to create new user accounts and to control access to it. Also see
“Using SNMP” on page 98.
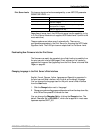
To Update the Initial
User
To update the initial user, select Admin | Network Settings | Detailed View
| SNMP, enter the two passwords (one for authentication and one for privacy)
and click the Update initial user button.