


Section 3: Setup for NetWare
18 Axis NPS 530/532 User’s Manual
Link a Print
Queue to the
Print Server
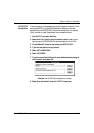
The next step is to link a print queue to the print server:
1. Start PCONSOLE according to steps 1-3 on the previous page.
2. Select Print Queue Information (3.xx) or Print Queues (4.xx). If you
plan to use an existing queue, then skip to step 5.
3. Press <Insert> to add a new queue.
4. Type a queue name, and press <Enter>.
5. Select the queue that you want the NPS 530/532 to service. The
Print Queue Information menu appears.
6. Select Queue Servers (3.xx) or Print Servers (4.xx).
7. Press <Insert> to display the Queue Server Candidates list.
8. Select AXIS<nnnnnn>.
9. Press <Escape> repeatedly to return to the main menu.
Repeat this procedure for every queue you want the NPS 530/532 to
service. The NPS 530/532 supports up to 96 print queues, defined on up
to 16 file servers.
Print Server Mode (Parameter Controlled)
This is similar to the automatic print server mode, but the NPS 530/532
will not automatically log in to all file servers and scan for queues to
service. Instead, the file servers and print queues are specified by a set of
parameters in the NPS 530/532 configuration. This is the recommended
method for medium-sized networks.
NetWare
Configuration
The NetWare configuration is identical to the one described for
automatic print server mode. Follow the instructions in “Add a Print
Server” (page 17) and “Link a Print Queue to the Print Server” (page 18) to
add a print server and assign queues to it.