


(No.PA019)1-29
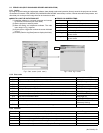
4.4.6 GHOST adjustment
PREPARATION
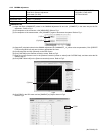
(1) Connect the PC and Projector with a RS-232C cable and turn the Projector ON.
(2) Boot the PSA software.
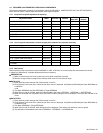
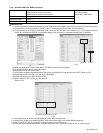
(3) Click [Connect] on the menu bar and select [Auto Connect] in the pull-down menu.
Refer to Fig.1.
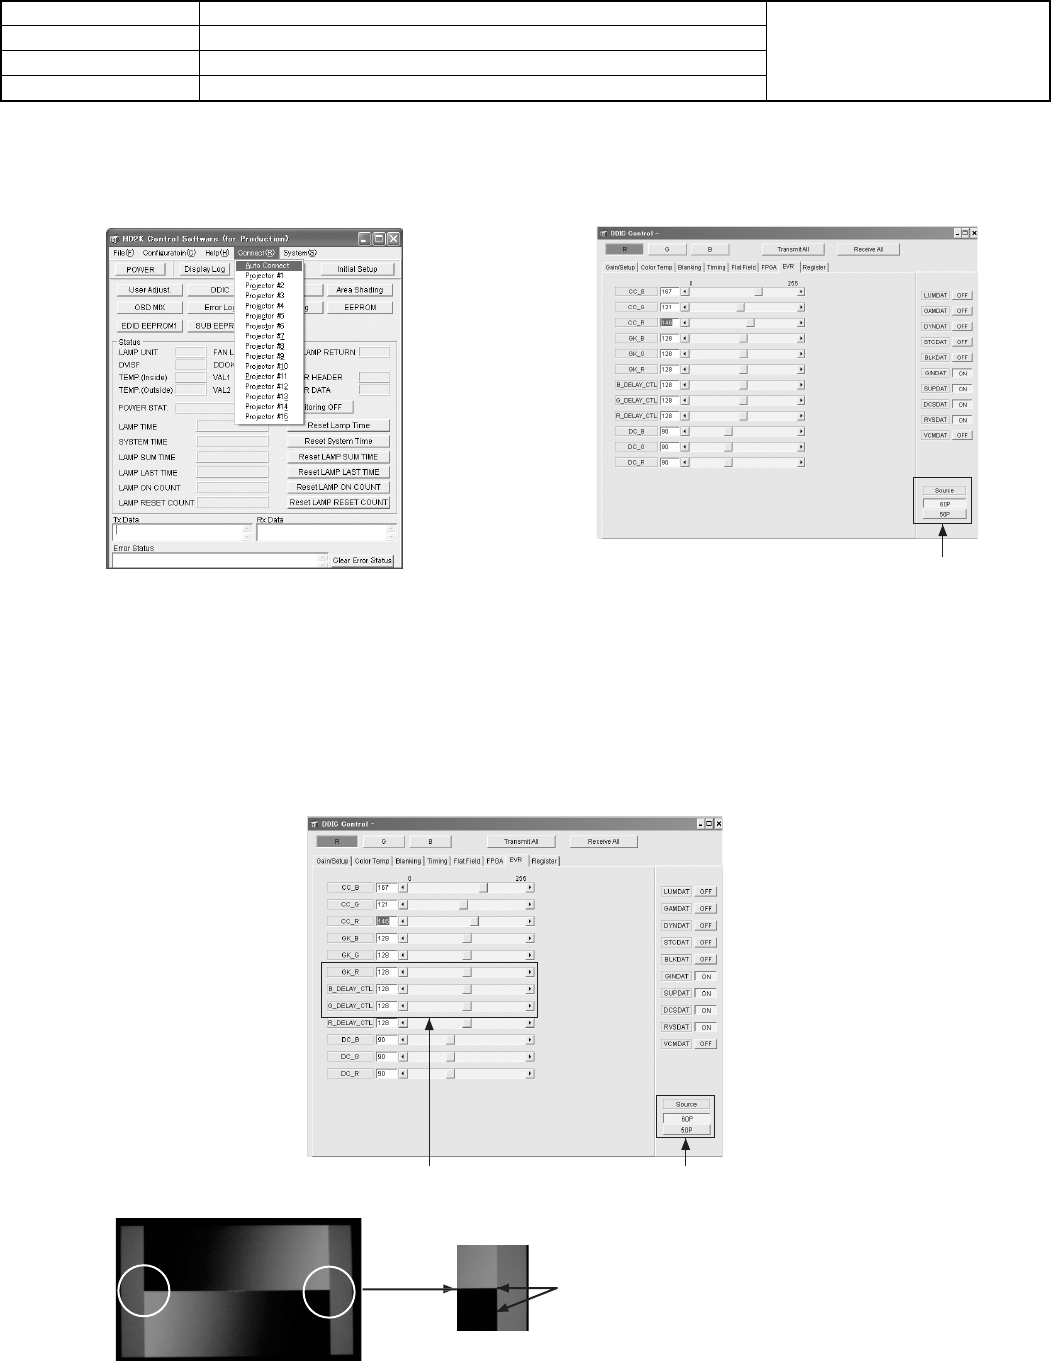
Fig.1
Fig.2
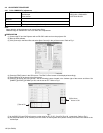
(4) When the connection is completed, press [DDIC]. The [DDIC Control] screen will appear.
(5) Press the [Receive All] button located at the top right of the screen.
(6) Click the [EVR] tab and then click [60P] as shown in Fig.2.
MEASUREMENT
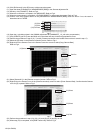
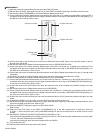
(7) Press the [TEST] button on the remote control unit to display the grey scale of [R] (Color to be adjusted).
(8) Using the [DDIC Control][EVR] tab, adjust [R_DELAY_CTL] (Refer to Fig.2) to allow the reflection to be minimum.
(9) Perform the procedures in steps (7) and (8) for [G] and [B].
(10) When the procedure in step (9) is completed, click [50P] in the [EVR] tab and then click [Receive All].
(11) Perform the procedures in items (7), (8) and (9).
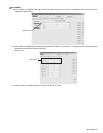
Fig.3
Fig.4
Instruments PSA Software for HD2K REPLACING COMPONENTS
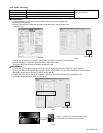
z OPTICAL BLOCK
Test point
Adjustment menu < DDIC >
Preparation Completed GAMMA adjustment , SHADING adjustment ,
(6)Select 60p
(8)Adjust these parameters. (10)Select 50p
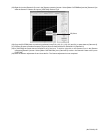
Enlarged
Adjust to minimize the reflection by monitoring
the left and right portions of the boundary.