


Page 13
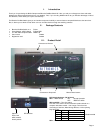
Visual Feedback – How do I know what port I am on?
When the Bitronics switch is in its normal scanning mode, the LEDs are flipping back and forth across the computer ports.
To see the software in action, simply hit the COMPUTER button so you can see a computer port’s connection. Press the
COMPUTER port until the LEDs around “1” are lit up, and you will see which device port it is currently connected to. If it is
in File Transfer mode, the computer port LEDs are green, and neither device port LEDs will be lit. Then, click on the
Bitronics software icon in the taskbar and change ports. You will see the LED of the Bitronics switch to the port you chose.
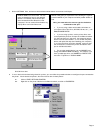
Using any other parallel device (not printers or mass storage devices) with a printer
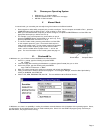
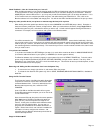
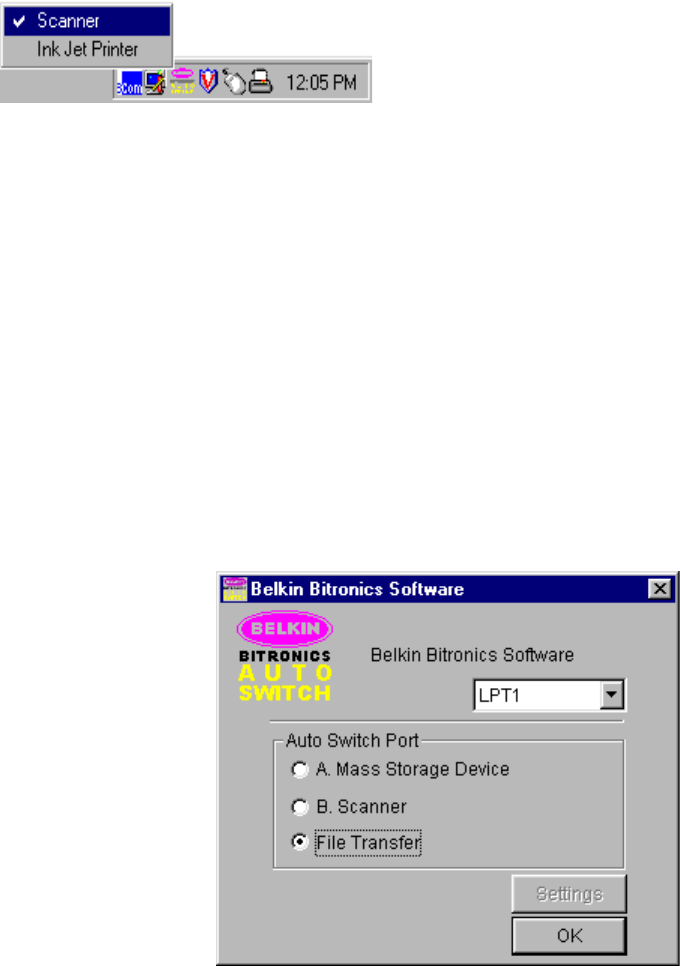
When dealing with other parallel port devices, they are set as SCANNERS in the SETTINGS (step 7 above). Examples of
these are scanners, parallel port cameras, and tape drives. When you need access to this device, simply single-click on
the Bitronics system tray icon, and select the device you wish to use. A check mark will appear showing which device is
connected. For example, we have a scanner and a printer on the Bitronics switch:
You will be connected to the scanner device indefinitely. But lets
say you wish to print to the Ink Jet printer, the software will again automatically switch to the port that has the printer and
send the print job. However, the switch will remain connected to the printer - it will not change back to the Scanner, unlike
the mass storage device mentioned previously. This means that you have to use this method to switch to the scanner each
time you need to use it.
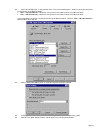
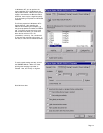
If no printers are installed
If no printers are installed, the SETTINGS type (see step 7) for each device must be set either for MASS STORAGE DEVICE
(if the device adds a drive letter to your system), or SCANNER (for all other types of devices).
The Bitronics software may not function properly in some systems if there is no DEFAULT PRINTER set. To do this, add a
printer using the Add Printer Wizard (click START, SETTINGS, PRINTERS), and just use the “Generic / Text Only” driver.
Remember to use “Local Printer” and “LPT1” when the wizard asks you. This will then be set as your default printer, so that
the Bitronics software can work properly.
Removing and Adding the Bitronics Switch Icon from the System Tray
• To remove the icon, simply right click on it, and answer YES to the prompt.
• To reload the icon back into the system tray, click on START, PROGRAMS, BELKIN BITRONICS SWITCH, “AutoSwitch-
Multi PCs”
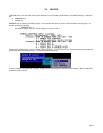
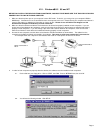
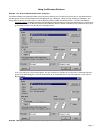
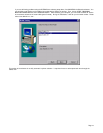
Using the File Transfer Feature
The file transfer feature of the Bitronics switch allows both
computers to connect as if there was a file transfer cable
connected between them. To do this, double-click on the
Bitronics switch system tray icon, and click on FILE
TRANSFER:
A set of PC LEDs on the Bitronics switch will turn green.
These LEDs represents the computer you are on now is set
for file transfer mode.
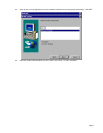
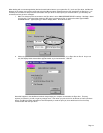
Next, the second PC must also perform the same operation.
When both sets of PC LEDs on the Bitronics switch are
green (all four), then the computers are ready for file
transfer. At this point, the cables and the Bitronics switch
act as if it was a file transfer cable. You can now run
programs such as Windows Direct Cable Connection, or
Laplink. Please refer to their user manuals or websites for
information on how to configure their software. Just
remember that your Bitronics switch setup mimics the file
transfer cable requirement.
Usage in Windows
NT