


Avaya P460 Installation and Maintenance Guide 19
Chapter 4
Turning on the Avaya P460
Introduction
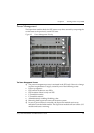
Once you have installed the Avaya P460 chassis and modules, you can turn the
chassis on. The Avaya P460 chassis can accommodate one, two or three PSUs
(Power Supply Units). The available power is divided among the modules by the
Supervisor Module. See “Power Management“ on page 23 further information.
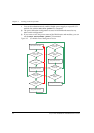
This chapter describes three basic scenarios:
• Turning on the P460 chassis in various configurations.
• Adding a PSU to the P460 chassis.
• Removing a PSU from the chassis.
Danger: The fans are on whenever the power is on in the chassis.
Caution: Do not leave any PSU slots open. Use the the blanking plates supplied to
cover empty slots.
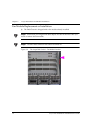
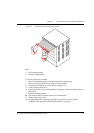
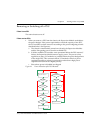
Installing a PSU
L Use the handle on the front panel of the PSU to lift it.
L You can install the PSU in any of the three slots.
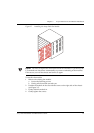
1 Remove the blanking plate by unscrewing the four retaining screws and gently
tugging the plate towards you.
2 Position the PSU with the label facing up and to the right.
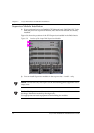
3 Gently slide the PSU back until the socket on the back of the PSU engages in the
plug on the chassis.
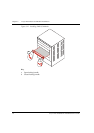
L Ensure the guiding pins on the front panel of the PSU align with the holes on
the front panel of the P460 chassis.
4 Gently tighten the screws on the PSU.