


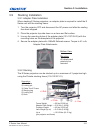

E Series User Manual
020-000515-01 Rev. 2 (03-2013)
Section 3: Installation
3-13
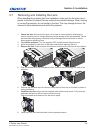
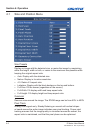
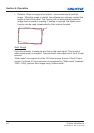
Insert the locking pin through the holes in the stacking legs. Make sure 2.
each pin is fully inserted.
NOTE: The steel ball on the end of the pin keeps the pin from releasing inadvertently.
Stacking
Leg
Hole
Pin
Steel Ball
Press botton to
remove or install
the pin
Pin
Inserted
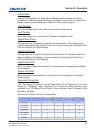
When required, repeat steps 1 and 2 for the third projector in the stack.3.
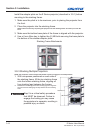
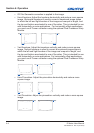
3.9.4 Stacking Alignment
Stacked projectors must be correctly aligned to one another so the resulting
display is optimized. If hoisting the stack, do so rst and then align. To align
the image, use pitch, yaw, or roll. Prior to aligning the image, turn the locking
nut to unlock then use the knob to adjust the image.
NOTE: Ensure to lock the locking nut to maintain the image adjustment.
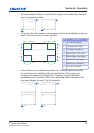
Pitch
Adjustment moves the
image up and down
Roll
Rotates the image clockwise
and counter-clockwise
Pitch
Adjustment moves the
image left and right
+/- Yaw
+/- Pitch
+/- Roll
Note: If the projector is parallel to the screen, some keystone will
be introduced with pitch and yaw adjustment.
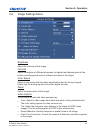
KNOB
LOCKING
NUT