


17-3
Cisco ASA 5500 Series Configuration Guide using ASDM
Chapter 17 Configuring Basic Settings
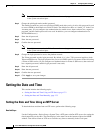
Setting the Date and Time
NTP is used to implement a hierarchical system of servers that provide a precisely synchronized time
among network systems. This kind of accuracy is required for time-sensitive operations, such as
validating CRLs, which include a precise time stamp. You can configure multiple NTP servers. The ASA
chooses the server with the lowest stratum—a measure of how reliable the data is.
Adding or Editing the NTP Server Configuration
To add or edit an NTP server, perform the following steps:
Step 1 In ASDM, choose Configuration > Device Setup > System Time > NTP.
Step 2 Click Add to display the Add NTP Server Configuration dialog box.
Step 3 Enter the NTP server IP address.
Step 4 Check the Preferred check box to set this server as a preferred server. NTP uses an algorithm to
determine which server is the most accurate and synchronizes to it. If servers are of similar accuracy,
then the preferred server is used. However, if a server is significantly more accurate than the preferred
one, the ASA uses the more accurate one.
Step 5 Choose the interface from the drop-down list. This setting specifies the outgoing interface for NTP
packets. If the interface is blank, then the ASA uses the default admin context interface according to the
routing table. To change the admin context (and the available interfaces), choose None (the default
interface) for stability.
Step 6 Choose the key number from the drop-down list. This setting specifies the key ID for this authentication
key, which enables you to use MD5 authentication to communicate with the NTP server. The NTP server
packets must also use this key ID. If you have previously configured a key ID for another server, you can
select it from the list; otherwise, enter a number between 1 and 4294967295.
Step 7 Check the Trusted check box to set this authentication key as a trusted key, which is required for
authentication to succeed.
Step 8 Enter the key value to set the authentication key, which is a string that can be up to 32 characters long.
Step 9 Re-enter the key value to make sure that you enter it correctly twice.
Step 10 Click OK.
Step 11 Check the Enable NTP authentication check box to turn on NTP authentication.
Step 12 Click Apply to save your changes.
Setting the Date and Time Manually
To set the date and time manually, perform the following steps:
Detailed Steps
Use the Configuration > Device Setup > System Time > Clock pane to manually set the date and time
for the ASA. The time is based on a 24-hour clock and displays in the status bar at the bottom of the
main ASDM pane.
In multiple context mode, you can set the time in the system configuration only.
To dynamically set the time using an NTP server, see the Configuration > Device Setup > System Time
> NTP pane; time derived from an NTP server overrides any time set manually in the Clock pane.