


2-13
Cisco Integrated Services Router Hardware Installation Guide
OL-27407-01
Chapter 2 Installing the Router
Installing the Cisco 810 ISR
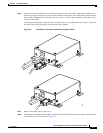
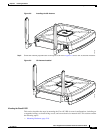
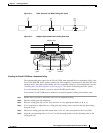
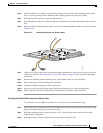
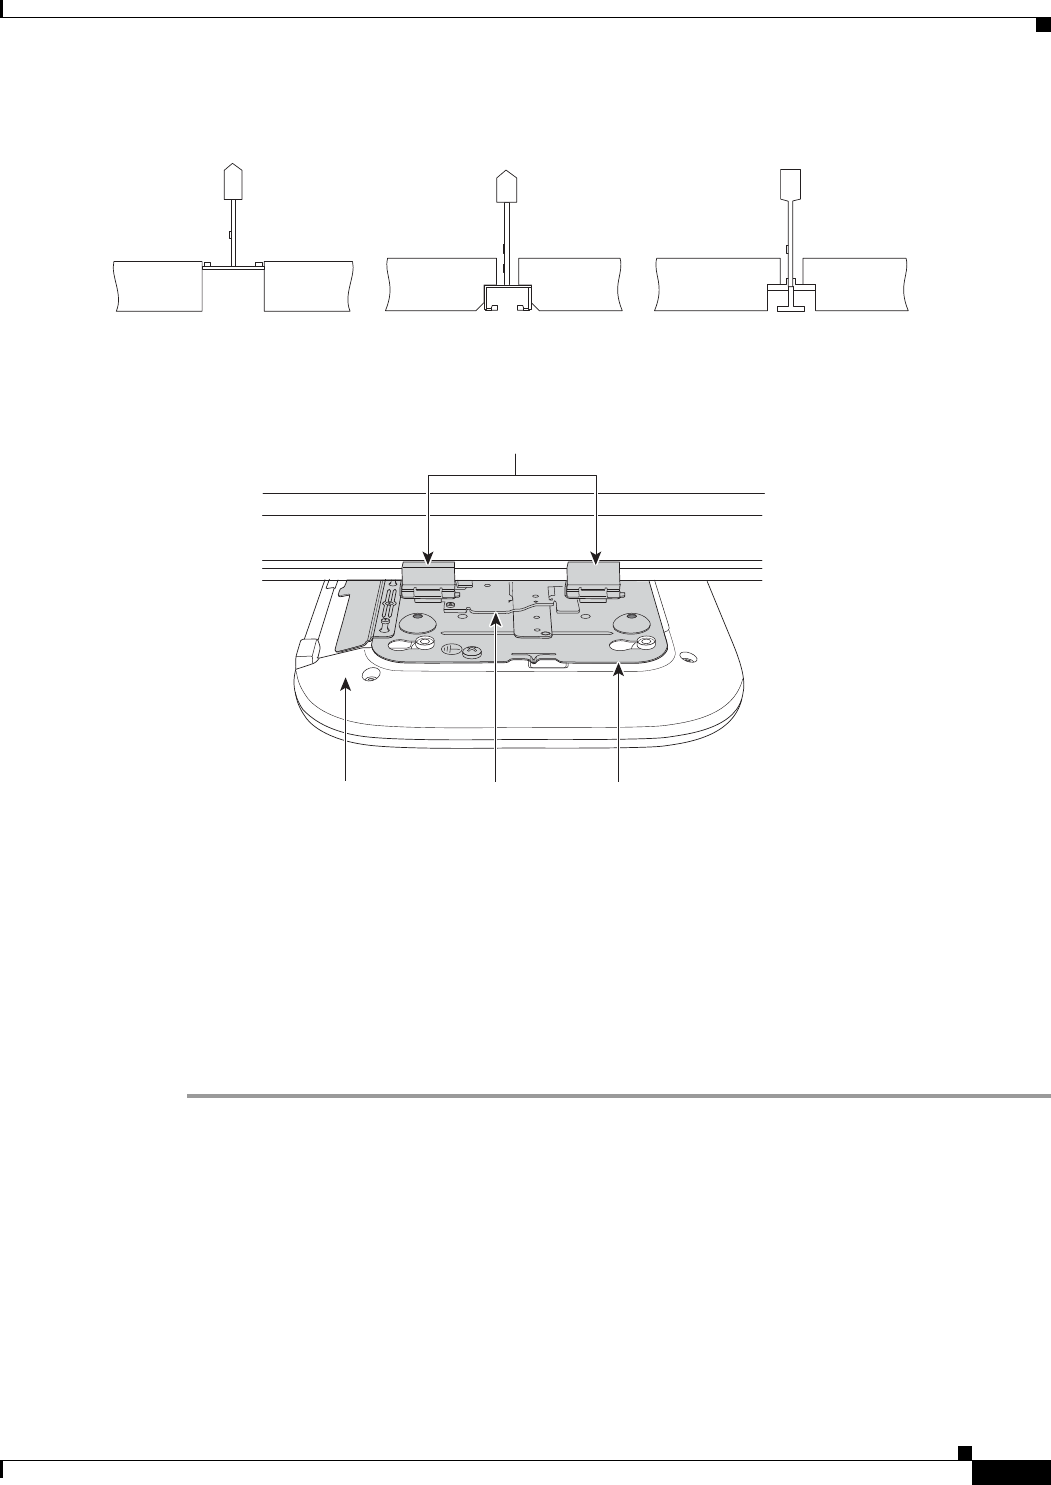
Figure 2-12 T-Rail, Channel, and Beam Ceiling Rail Types
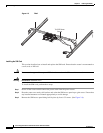
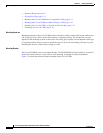
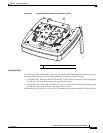
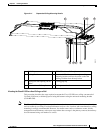
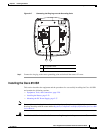
Figure 2-13 Adapter Clips Installed with Ceiling Grid Clips
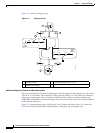
Mounting the Cisco 812 ISR Below a Suspended Ceiling
The recommended power option for the Cisco 812 ISR, when mounted below a suspended ceiling, is the
Cisco C810-POE-SPL (PoE+ splitter) with the use of the supplied 1.3 meter power cable and Cat5 cable
(Plenum rated). The cables can be hidden above the suspended ceiling for a clean installation. See the
“Installing the Cisco PoE+ Splitter” section on page 2-2 for details on installing the PoE+ splitter.
Use a flat screwdriver if there is a need to remove the GE/console cables.
To mount the Cisco 812 ISR below a standard or recessed suspended ceiling, perform these steps.
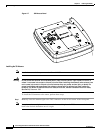
Step 1 Decide where you want to mount the router on your suspended ceiling.
Step 2 Open the ceiling grid clip completely.
Step 3 Place the ceiling grid clip over the T-rail and close it to the appropriate detent (A, B, or C).
Step 4 Use a screwdriver to tighten the two ceiling grid clip locking screws to prevent the clip from sliding
along the T-rail.
Step 5 Observe the ceiling grid clip width detent letter (A, B, or C) that corresponds to the T-rail width.
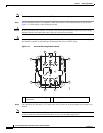
Step 6 Align the corresponding holes (A, B, or C) on the mounting bracket over the mounting holes on the
ceiling grid clip.
281531
281532
Adapter clips
Ceiling grid
clip
Mounting
bracket
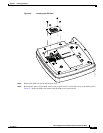
Access
point