40
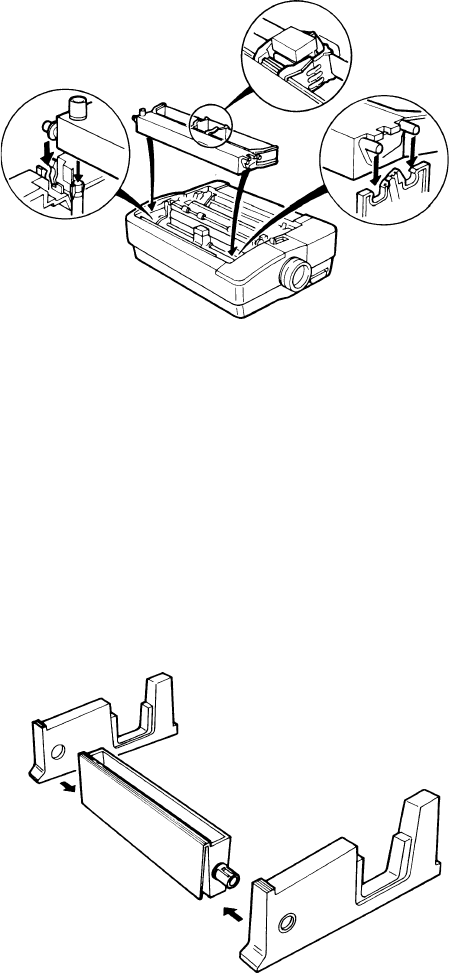
1 Turn the printer off and remove the top cover and the black ribbon cartridge.
2 Position the colour unit over the compartment at the right hand side of the printer as
shown above. Notice that the bottom of the colour unit has a slot that looks like an upside
down Y.
3 Slide the colour unit down to fit the Y over the bar. Make sure that the connection is
secure.
4 Fit the connector pins of the cable into the slot on the edge of the control panel
5 Slide the ribbon roller guide to the centre of the ribbon. Position the cartridge as illus-
trated and fit the roller guide over the print head. Note: Keep the ribbon taut with the
ribbon knob to make this job easier.
6 Click the tabs at each end of the ribbon car-
tridge into the corresponding slots. The car-
tridge should be secure but the whole
mechanism will tilt up and down. Don’t worry
about this - it is to enable colour printing.
7 Check that the ribbon is taut (but don’t tighten
it too much!). Replace the cover and turn on
the printer, ready for printing.
8 Set the ribbon to COLOUR in the INSTALL
menu, then move the slide switch to SETUP
and press SAVE for three seconds to in-
stall the option.
Using The Colour Kit
The colour option can be activated via the control panel on the top of the printer. You use the
control panel to scroll through all seven colours (the four basic and three mixed) including black.
The selection sequence is: black, red, blue, violet, yellow, orange, green. if you press the key
while the printer is on line it will complete the present line of print and then change to the next
colour in sequence for the following line. You can use a black ribbon without removing the colour
unit. If you are changing ribbons be sure to turn the printer off first.
The Printer Stand
There is an optional printer stand available. Made of
robust plastic construction, it matches the colour of
the printer. It consists of three pieces - a front piece
with a pocket for manuals and two side pieces. They
slot together at the front .
The printer is then fitted on top. The stand can also be
used to assist the insertion of paper into the bottom
feed slot (see Chapter 2).
The Serial interface
Serial Interface Specification The serial interface is standard on the Swift 120D printer. With
all other Swift printers, the interface is a user-installable option.


