


3-9
The scanning process
The initiation of the scanning process may vary from application to
application. Consult the application’s manual for more information if
the steps below don’t result in a scan. The instructions provided in
these steps assume the application uses the most common process.
To scan an image:
1. Start the TWAIN compliant image editing application in Windows.
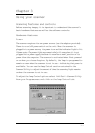
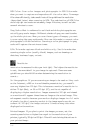
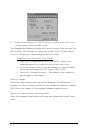
2. Select Acquire from the File menu. This displays the Flatbed
Scanner window.
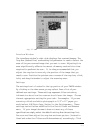
3. Place the image face down on the scanner glass. Click Prescan.
The prescanned image displays in the Prescan window.
4. Adjust the image as you desire. Make your selections for scan
mode, resolution, etc., and use the crop box in the Prescan
window to select the area you want to scan. Follow the guidelines
described in the previous section to make your selections.
Note: If the image is not as large as the Crop box, the additional
blank area is also scanned, creating an unnecessarily large file. Be
sure to adjust the Crop box to fit the exact area you want to scan.
To do so, simply click and drag one of the box corners.
5. When you are satisfied with the selected settings, click Scan.
The image is scanned using the selected settings, and transferred
into the application’s workspace.
6. Click Cancel to close the Flatbed Scanner window.
You are returned to the application, and the scanned image is
displayed in the workspace. You may now manipulate, save, print, or
fax the image.
Other scanning features
Your ImageReader scanner is capable of scanning all types of
documents and images. The scanning instructions provided here are
to ensure the installation is complete and your scanner is working
properly. For more detailed instructions about manipulating images
once they are scanned, or for using your scanner for OCR, document
archiving/retrieval, and faxing, refer to those applications’ manuals.