10. Enter system setup and select the appropriate Drive option.
11. Verify that your computer works correctly by running the Dell Diagnostics.
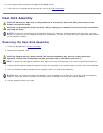
Heat-Sink Assembly
CAUTION: Before you begin any of the procedures in this section, follow the safety instructions in the
Product Information Guide.
CAUTION: To guard against electrical shock, always unplug your computer from the electrical outlet before
removing the cover.
NOTICE: To prevent static damage to components inside your computer, discharge static electricity from your body
before you touch any of your computer's electronic components. You can do so by touching an unpainted metal surface
on the computer chassis.
Removing the Heat-Sink Assembly
1. Follow the procedures in "Before You Begin."
2. Remove the computer cover.
CAUTION: Despite having a plastic shield, the heat-sink assembly may be very hot during normal
operation. Ensure that the assembly has had sufficient time to cool before you touch it.
NOTE: To loosen the two captive screws on each side of the heat-sink assembly, you need a long Phillips screwdriver.
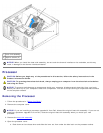
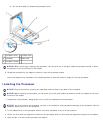
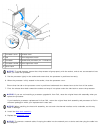
3. Loosen the two captive screws that attach the heat-sink assembly to the system board on either side of the assembly.
4. Pivot the assembly toward the back of the computer and lift to remove the assembly.
NOTICE: After you remove the heat-sink assembly, lay the assembly on its side. Do not set the heat-sink assembly
upright or touch the thermal interface, as this may result in damage to the thermal interface material.
5. Lay the assembly aside on its side.


