


l Wide flat-blade screwdriver
l #1 and #2 Phillips-head screwdrivers
l 1/4-inch nut driver
l Tweezers or long-nose pliers
l Wrist grounding strap
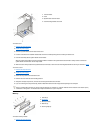
Cover
To remove the computer cover, perform the following steps.
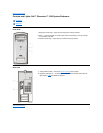
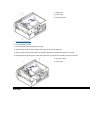
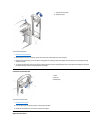
1. Face the front of the computer. Place your left hand on the left side of the computer. Push back the release latch at the top back edge of the
computer to release the computer cover into your left hand.
2. Lift the cover out from the curved hinge at the bottom of the computer.
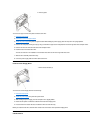
To replace the computer cover:
1. Rotate the power supply back into place.
2. Check all cable connections, especially those that might have come loose during your work. Fold cables and unused connectors out of the
way so that they do not catch on the computer cover or interfere with airflow inside the computer.
3. Check to see that no tools or extra parts (including screws) are left inside the computer.
4. Place the computer upright with the front facing you. Align the computer cover so its bottom hooks fit in the computer’s curved hinge.
5. Lift up the cover, making sure to keep the bottom hooks aligned with the curves in the computer.
6. Gently squeeze the right and left sides of the computer together until the cover clicks into position.
Rotating the Power Supply
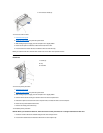
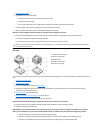
1
Release latch
2
Computer cover
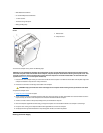
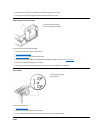
NOTICE: To avoid inadvertently damaging the system board, be sure you that disconnect the computer from the electrical outlet,
disconnect the power cable from the back of the computer, and press the power button before removing the computer cover. This
computer continues to receive a small amount of power when the computer is turned off and attached to an electrical outlet (the
system-board power light is on when power is detected).
CAUTION: Keep your hands clear of the metal edges on the computer frame and fan guard as you slide the cover back.