


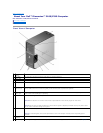


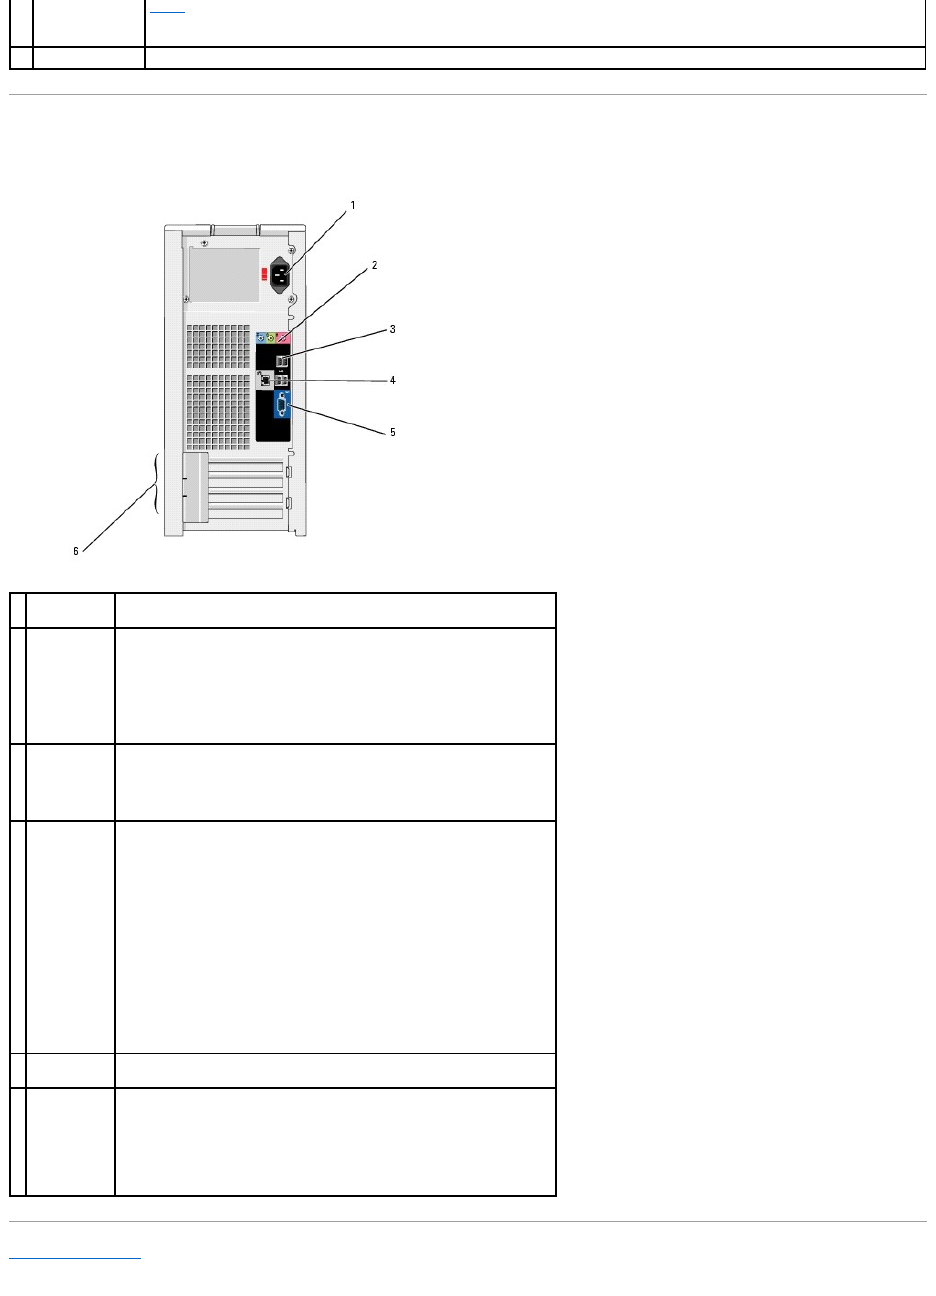
Back View of Computer
Back to Contents Page
(4)
Lights."
11
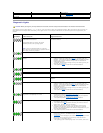
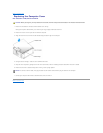
Service Tag
Used to identify your computer when you access the Dell Support website or call technical support.
1
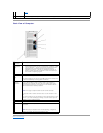
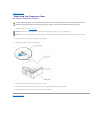
power
connector
Insert the power cable.
2
sound card
connectors
(3)
l Line-in connector — Use the blue line-in connector to attach a
record/playback device such as a cassette player, CD player, or VCR.
l Line-out connector — Use the green line-out connector to attach
headphones and most speakers with integrated amplifiers.
l Microphone connector — Use the pink microphone connector to
attach a personal computer microphone for voice or musical input
into a sound or telephony program.
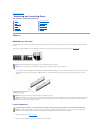
3
USB 2.0
connectors
(4)
Use the back USB connectors for devices that typically remain connected,
such as printers and keyboards.
It is recommended that you use the front USB connectors for devices that
you connect occasionally, such as joysticks or cameras.
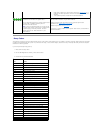
4
network
adapter
connector
To attach your computer to a network or broadband device, connect one
end of a network cable to either a network jack or your network or
broadband device. Connect the other end of the network cable to the
network adapter connector on your computer. A click indicates that the
network cable has been securely attached.
NOTE: Do not plug a telephone cable into the network connector.
On computers with a network connector card, use the connector on the
card.
It is recommended that you use Category 5 wiring and connectors for your
network. If you must use Category 3 wiring, force the network speed to
10 Mbps to ensure reliable operation.
5
VGA video
connector
If your monitor has a VGA connector, plug it into the VGA connector on the
computer.
6
card slots
Access connectors for any installed PCI cards (two slots) and a x1 PCI
Express card.
NOTE: Although your computer has 4 card slot openings, it supports a
maximum of 3 cards; the bottom slot cannot be used.