fi-412PR Imprinter Operator’s Guide | 5
2. Installation
2.1. Installing the Imprinter
Install the imprinter as follows:
1. Press the button to switch off the Scanner and
disconnect the electrical power cable.
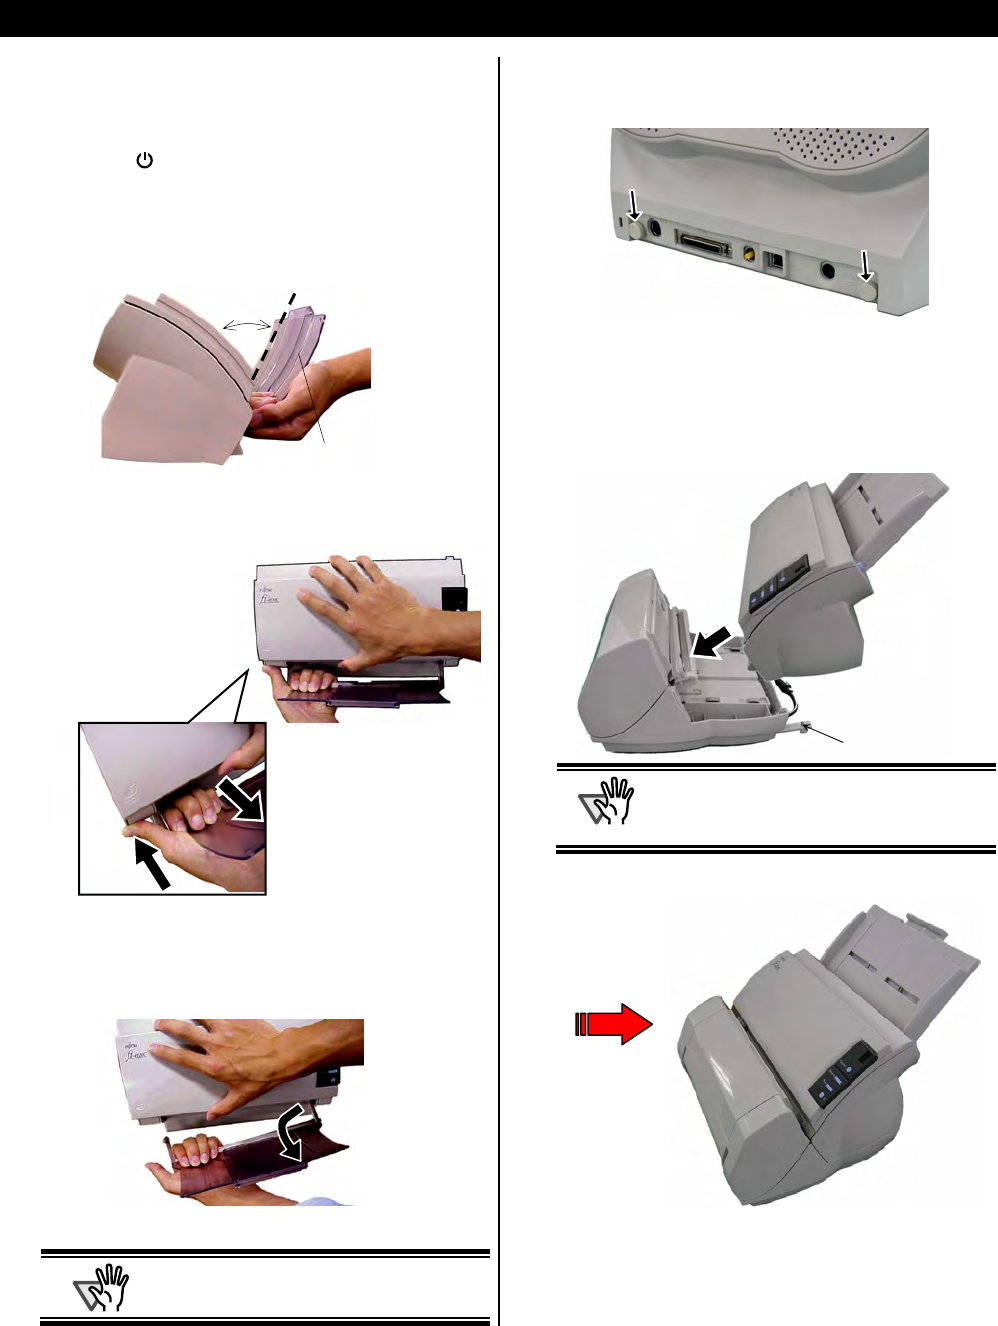
2. Remove the Stacker from the scanner as shown
below.
1) Hold the left side of the stacker with left hand.
2) While pressing on the scanner with your thumb, pull the
stacker gently away from the scanner.
3) When the left side of the stacker has been released from
the scanner, remove the right side of the stacker.
ATTENTION
You must remove the stacker before installing
the scanner to the imprinter.
3. Remove the two screws located at the back of the
scanner.
4. Install the Scanner on to the Imprinter.
Hold the Scanner above the rear side of the Imprinter and
gently place the Scanner on to the base of the Imprinter
while lowering it forward until it makes contact with the
Imprinter.
ATTENTION
● Be careful not to place the Scanner on to
the Fix Tabs or hit hard against them as
you might damage the Fix Tabs.
● Take care not to pinch your fingers.
2
Carefully pull the stacker
out.
1 Press your thumb on the scanner.
About 80 degrees
Stacker
After installation
Fix Tab


